
Building the binaries#
This section describes the necessary steps for obtaining the binary files for usage with the boards.
Prerequisites#
To build any of the demo applications, you need the following toolchain:
IAR Embedded Workbench for Arm (details in release note)
Visual Studio Code with “MCUXpresso for Visual Studio Code” extension (details in release note)
Teraterm (version 4.105 or higher)
The Connectivity Software Package does not include support for any other toolchains. The packages must be built with the debug configuration to enable debugging information. This package includes various sample applications that can be used as a starting point.
Conventions for building the wireless_UART application.#
The following sections present the steps required for building the wireless_UART application. All applications can be found using the following placeholders for text:
<connectivity_path>: represents the root path for the SDK.<board>: represents the target board for the demo app, “kw47evk” in this case.<RTOS>: represents the scheduler or RTOS used by the app; it can be either “bm” or “freertos”.<demo_app>: represents the demo application name.<IDE>: represents the integrated development environment used to build projects; “iar” in this case.<core_id>: represents the target CPU on which the application will run, “cm33_core0” in this case (applicable only on KW47-EVK, KW47-LOC, MCX-W72-EVK, FRDM-MCXW72 and FRDM-KW43 boards).The general folder structure of the demo applications is the following:
<connectivity_path>\boars\<board>\wireless_examples\bluetooth\<demo_app>\<core_id>\<RTOS>\<IDE>
Selected application: w_uart
Board: One of the following boards:
kw45b41zevk (for this guide)
kw45b41zloc
frdmmcxw71
kw47evk
kw47loc
mcxw72evk
frdmmcxw72
frdm-kw43
RTOS: FreeRTOS
Resulting location:
<connectivity_path>\boards\<kw45b41zevk / kw45b41zloc / frdmmcxw71 / kw47evk / kw47loc / mcxw72evk / frdmmcxw72/frdm-kw43>\wireless_examples\bluetooth\w_uart\freertos\<IDE>
Building and flashing BLE demo applications using IAR Embedded Workbench#
This guide shows how to build and flash Bluetooth Low Energy demo applications using IAR Embedded Workbench and the west build environment.
Prerequisites#
west build environment - Follow Getting Started with MCUXpresso SDK Repository
IAR Embedded Workbench for Arm (see release notes for version)
GitHub MCUXpresso SDK repository cloned locally (west init -m https://github.com/nxp-mcuxpresso/mcuxsdk-manifests.git)
Step 1: Generate IAR Project#
Use west build to generate the IAR project:
west build -b <board> <application_path> --toolchain=iar -t guiproject -Dcore_id=<core_id> --pristine
Example for Wireless UART on KW47-EVK:
west build -b kw47evk examples/wireless_examples/bluetooth/w_uart/freertos/ --toolchain=iar -t guiproject -Dcore_id=cm33_core0 --pristine
Parameters:
Parameter |
Description |
|---|---|
|
Target board (kw47evk, kw47loc, frdmkw43, frdmmcxw72, etc.) |
|
Use IAR toolchain |
|
Generate IAR workspace |
|
CPU core (for KW47, MCXW72) |
|
Clean build |
Supported boards: kw47evk, kw47loc, frdmmcxw71, frdmmcxw72, mcxw72evk, frdmkw43.
Output: IAR workspace at build/iar/<project_name>.eww
Note: The west build command builds in debug mode by default. To build in release mode, add --config=release to the command.
Step 2: Open IAR Workspace#
Navigate to
build/iar/Open the
.ewwfile in IAR Embedded Workbench
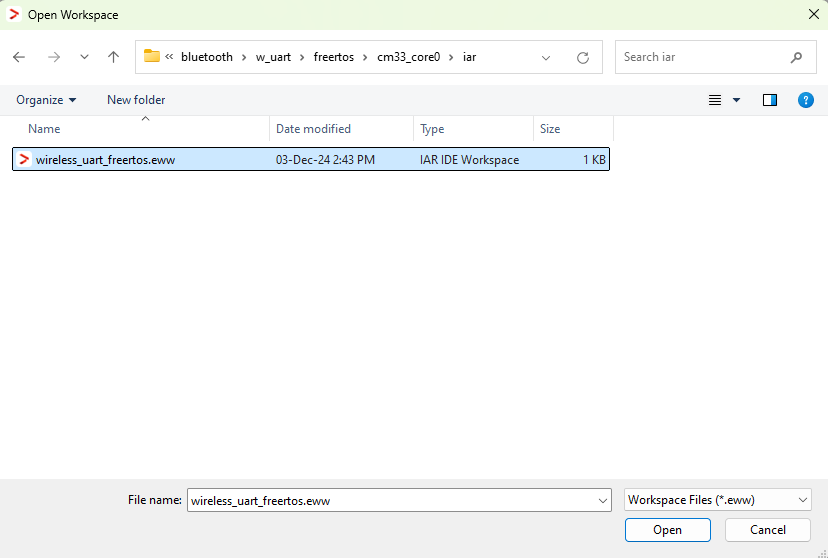
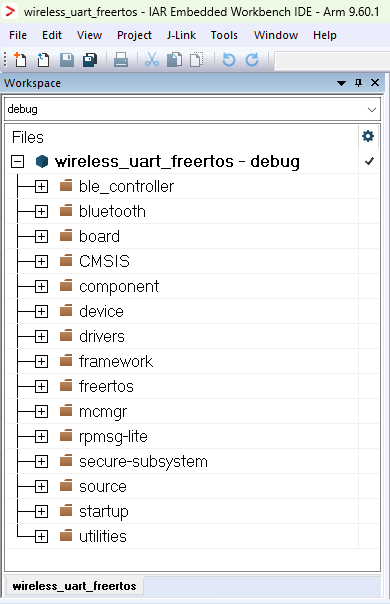
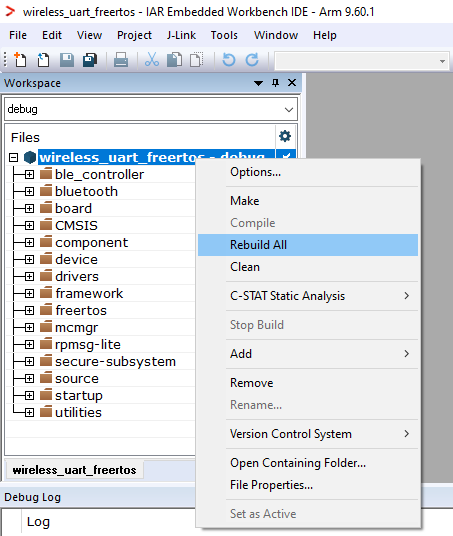
Step 3: Build Project#
Build the project using Project > Make or F7.
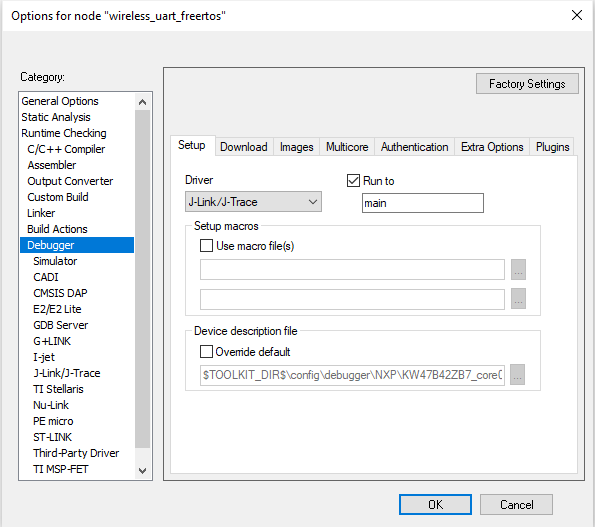
Step 4: Configure Debugger#
Go to Project > Options (Alt+F7) > Debugger > Setup > Driver
Select debugger:
CMSIS-DAP for kw45b41zevk, mcxw71evk, frdmmcxw71
J-Link for kw47evk, kw47loc, mcxw72evk, frdmmcxw72, frdmkw43
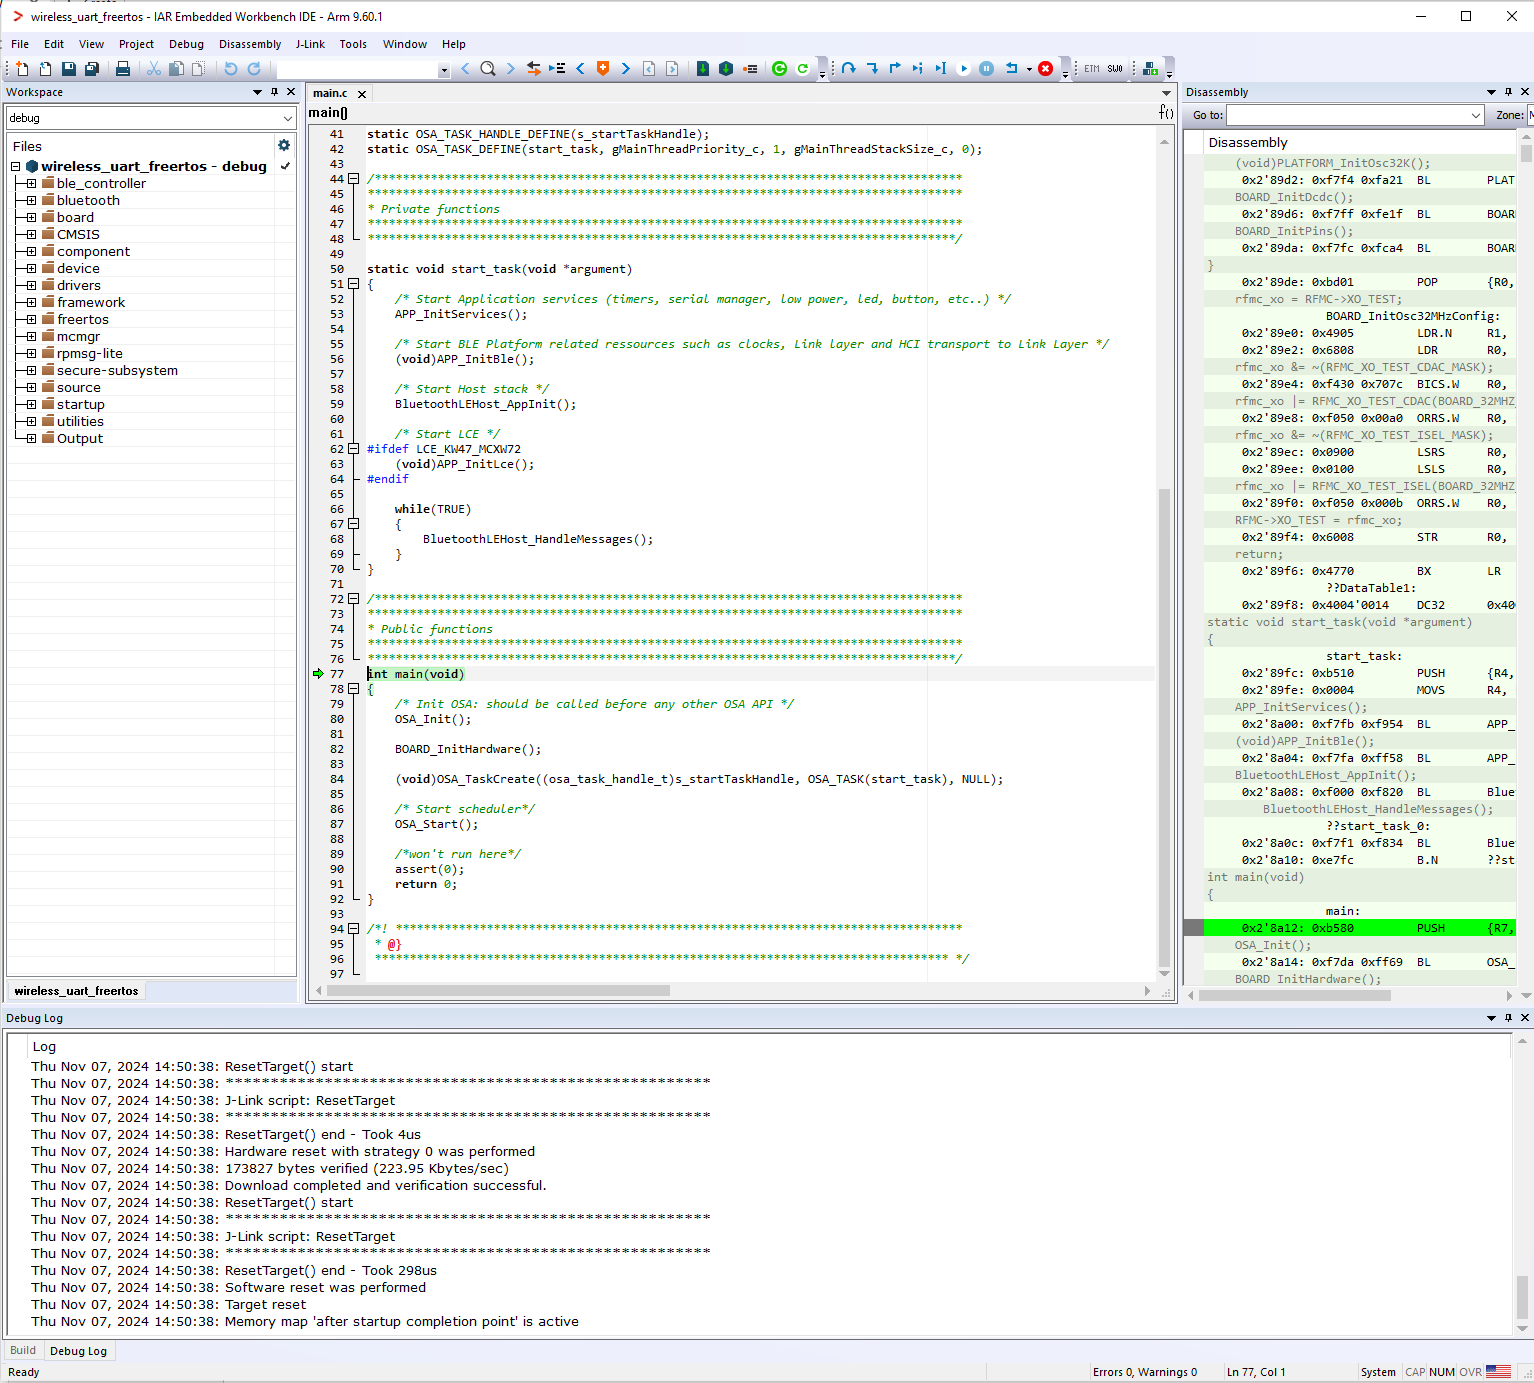
Step 5: Flash and Debug#
Click Download and Debug or press Ctrl+D.
Step 6: Run Application#
Press Go (F5) to start the application.
Notes#
To rebuild after configuration changes, run west build with
--pristineBuild artifacts are in the
build/directoryChange board with
-bparameter and application path as needed
Parent topic: Building the binaries
Building and flashing the BLE software demo applications using Visual Studio Code#
To build and flash the BLE software demo applications using Visual Studio Code, follow the steps listed below:
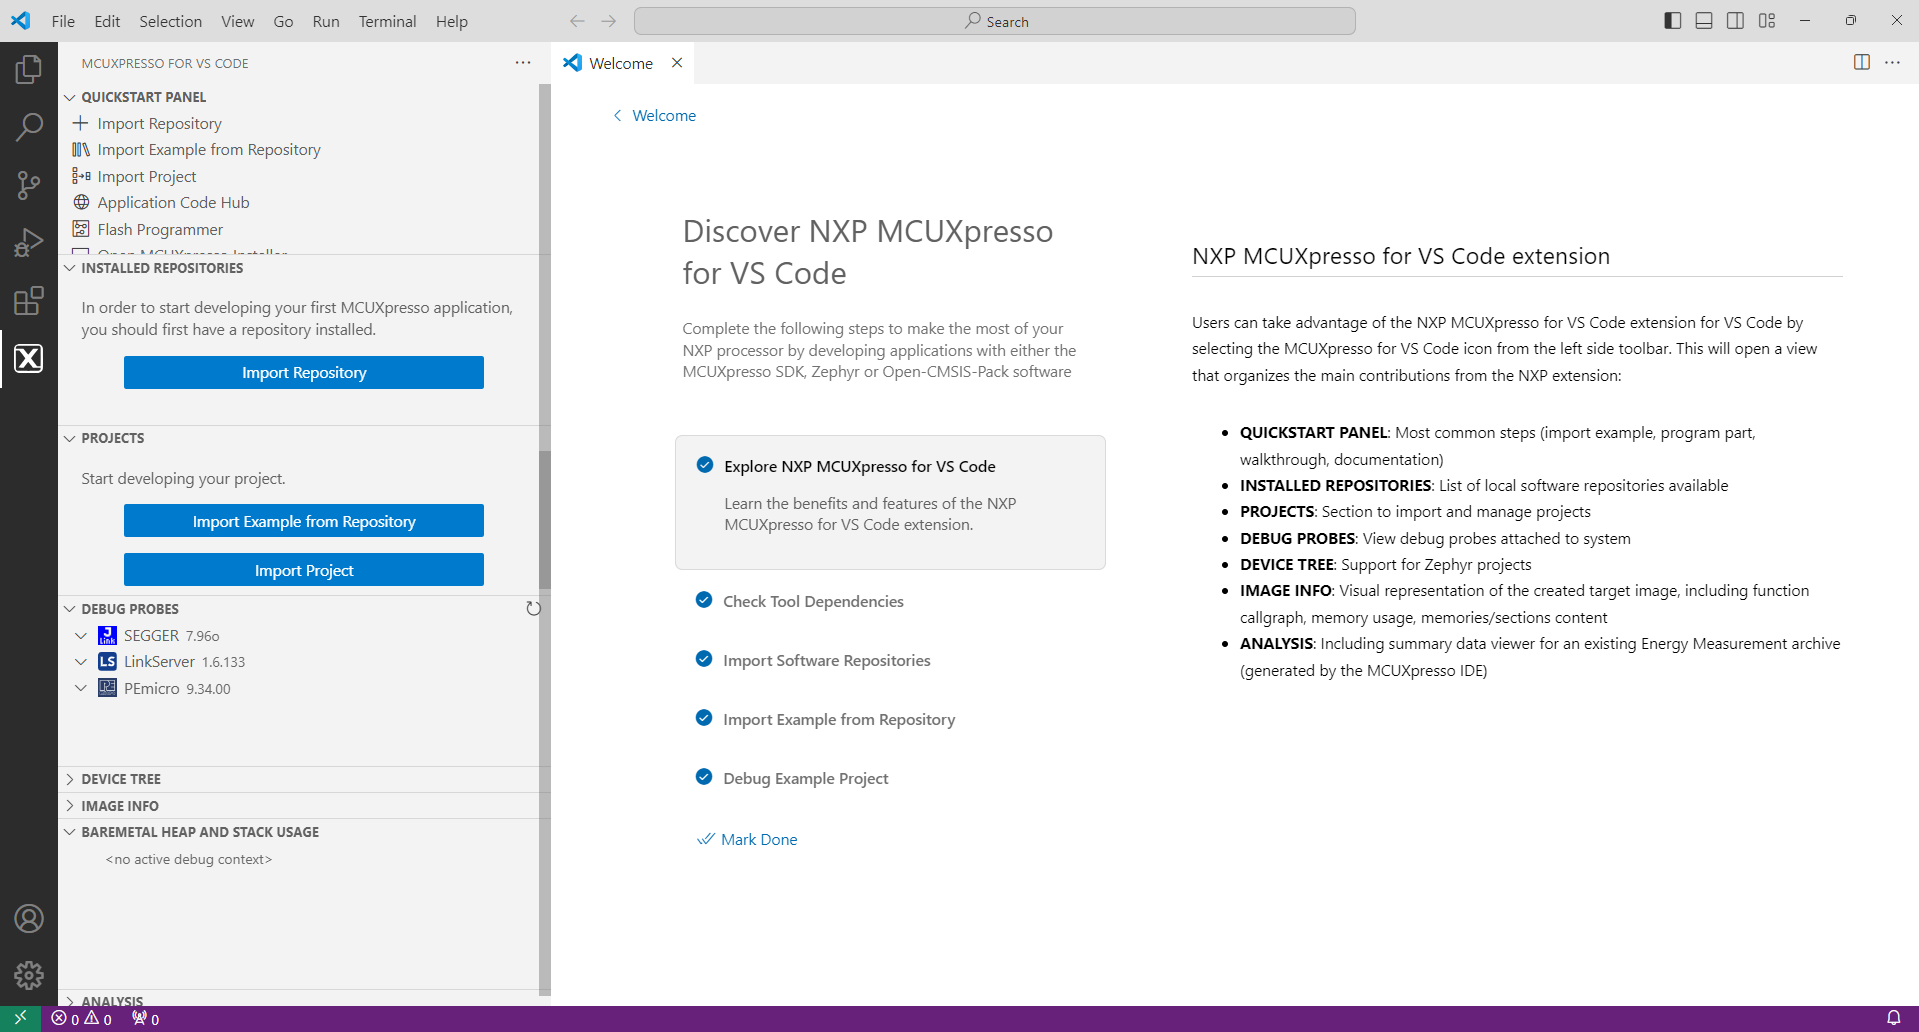
Open Visual Studio Code and open the MCUXpresso for Visual Studio Code extension as shown in the figure below.
MCUXpresso for Visual Studio Code extension
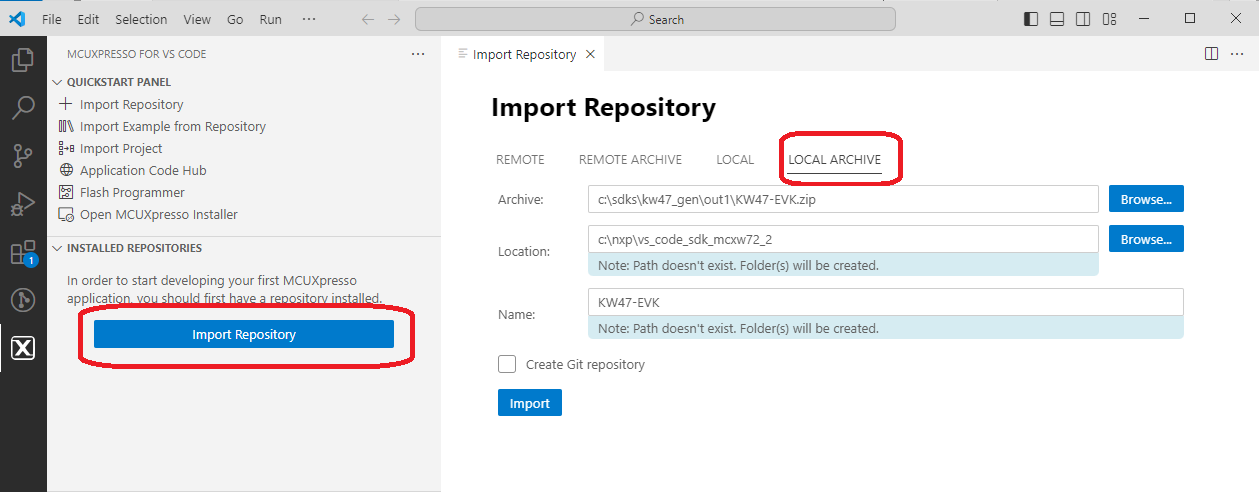
Import the SDK package: click “Import Repository”. Then, choose the “Local” option (if the SDK is archived use “Local archive”), browse to the path of the SDK you want, and click “Import”.
Steps to import the SDK
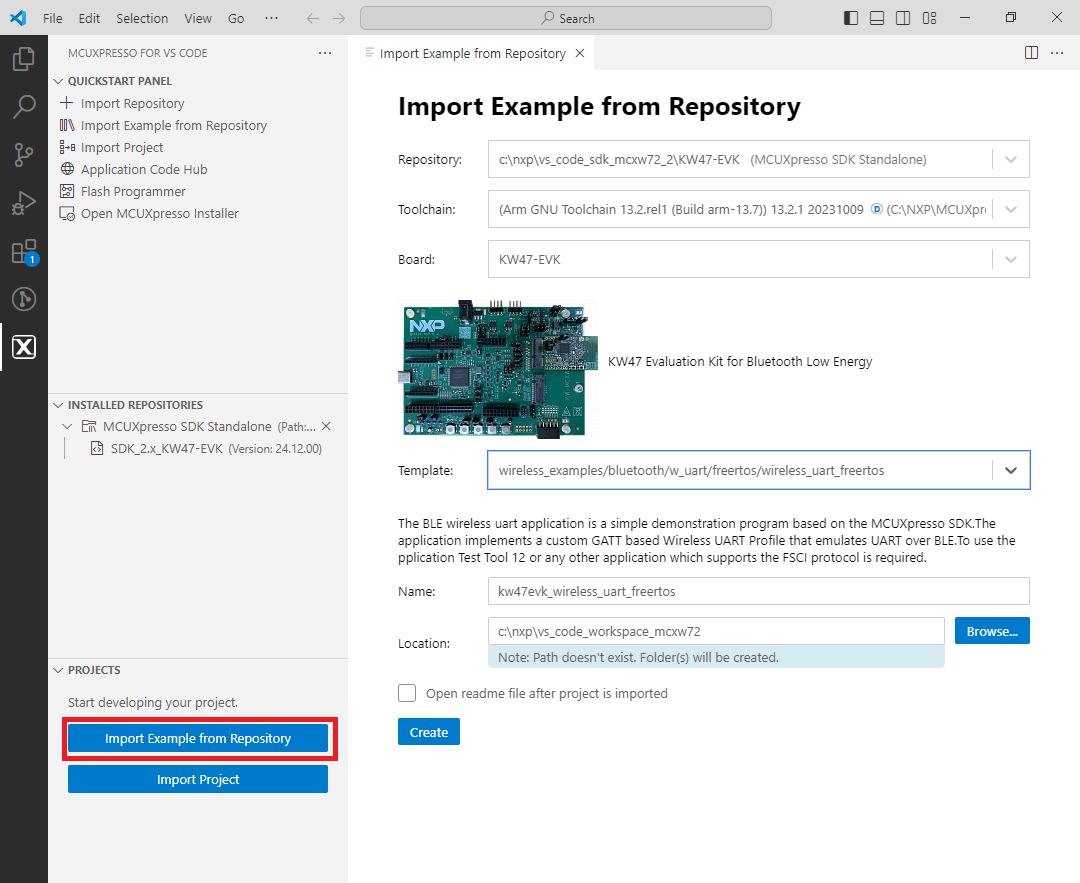
After the SDK is loaded successfully, select the “Import Example from Repository” to add an application to your workspace. Choose the repository, toolchain (Arm GNU), board, example you want to add, and the location where the VS Code project would be created. Then click “Create”.
Steps to import the example application
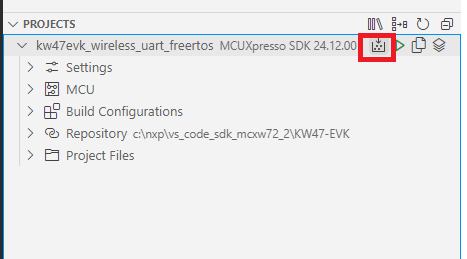
The application now appears in the “Projects” tab on the left. Build the application by pressing the “Build selected” button.
Building the Wireless UART FreeRTOS application
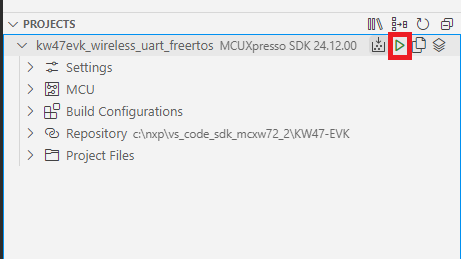
After the build is completed successfully, debug the application by clicking the “Debug” button.
Debug the Wireless UART FreeRTOS application
Press the run (“Continue”) button twice to run the application on the board.
Running the Wireless UART FreeRTOS application
Parent topic:Building the binaries
Building and flashing the BLE Extended NBU software demo applications using IAR Embedded Workbench#
Use the following steps in order to build and flash the BLE software demo applications using the IAR Embedded Workbench:
First unpack the contents of the archive to a folder on the local disk. Then, navigate to the resulting location starting from the SDK root directory.
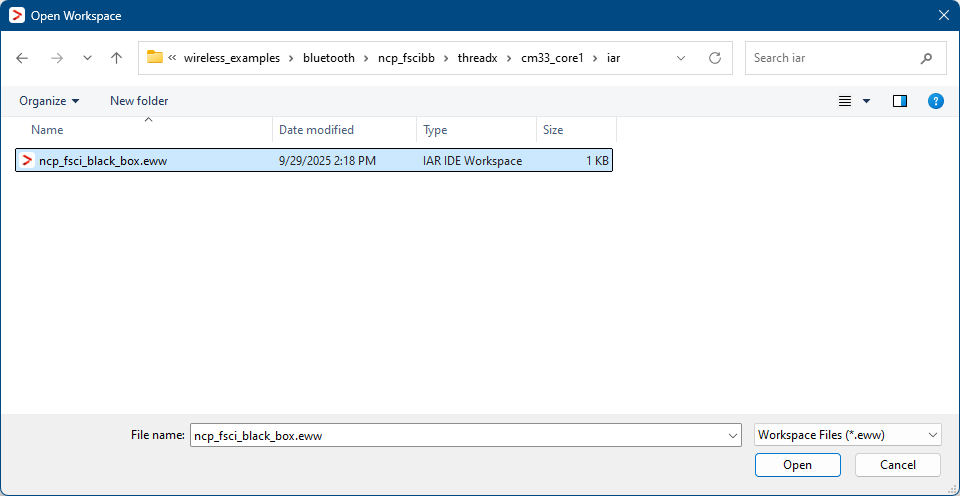
Open the IAR workspace file (
*.ewwfile format) highlighted file in the figure below.NCP FSCI Blackbox IAR demo project location
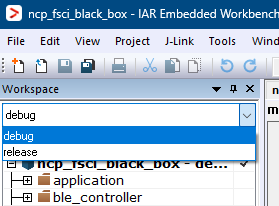
Choose between Debug and Release configurations in the drop-down selector above the project tree in the workspace.
Select the desired configuration (Debug or Release)
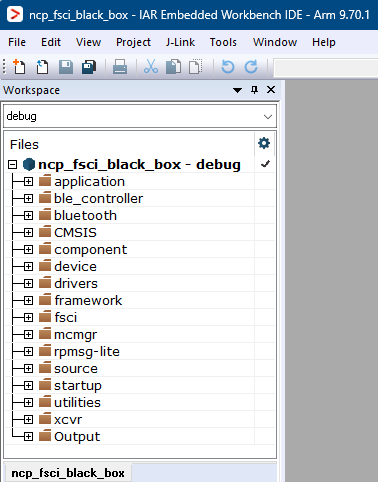
The figure below shows the NCP FSCI Blackbox - IAR workspace.
NCP FSCI Blackbox - IAR workspace
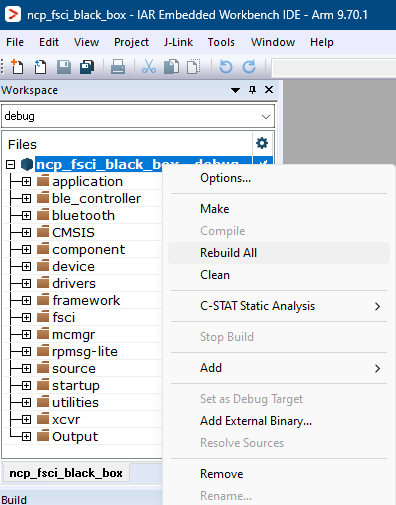
Build the NCP FSCI Blackbox project using the options shown in the figure.
Build NCP FSCI Blackbox application
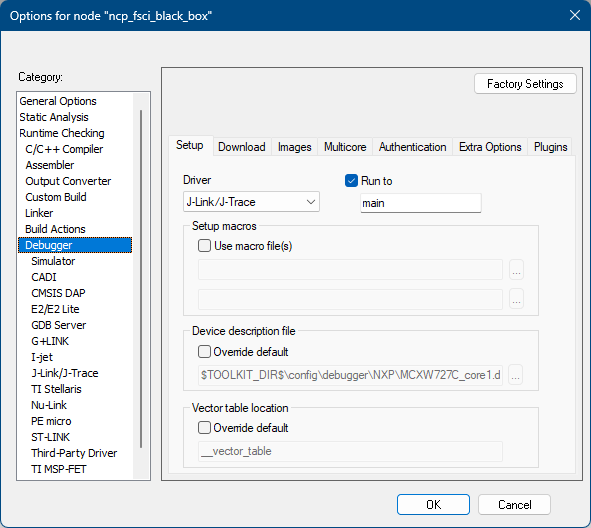
Make the appropriate debugger settings in the project options window, as seen in the next figure.
Go to: Project > Options (Alt+F7) > Debugger > Setup (tab) > Driver > J-Link/J-Trace
Debugger Settings for the NCP FSCI Blackbox project
Click the “Download and Debug” button (or CTRL+D) to flash the executable onto the board.
Download and Debug the NCP FSCI Blackbox application
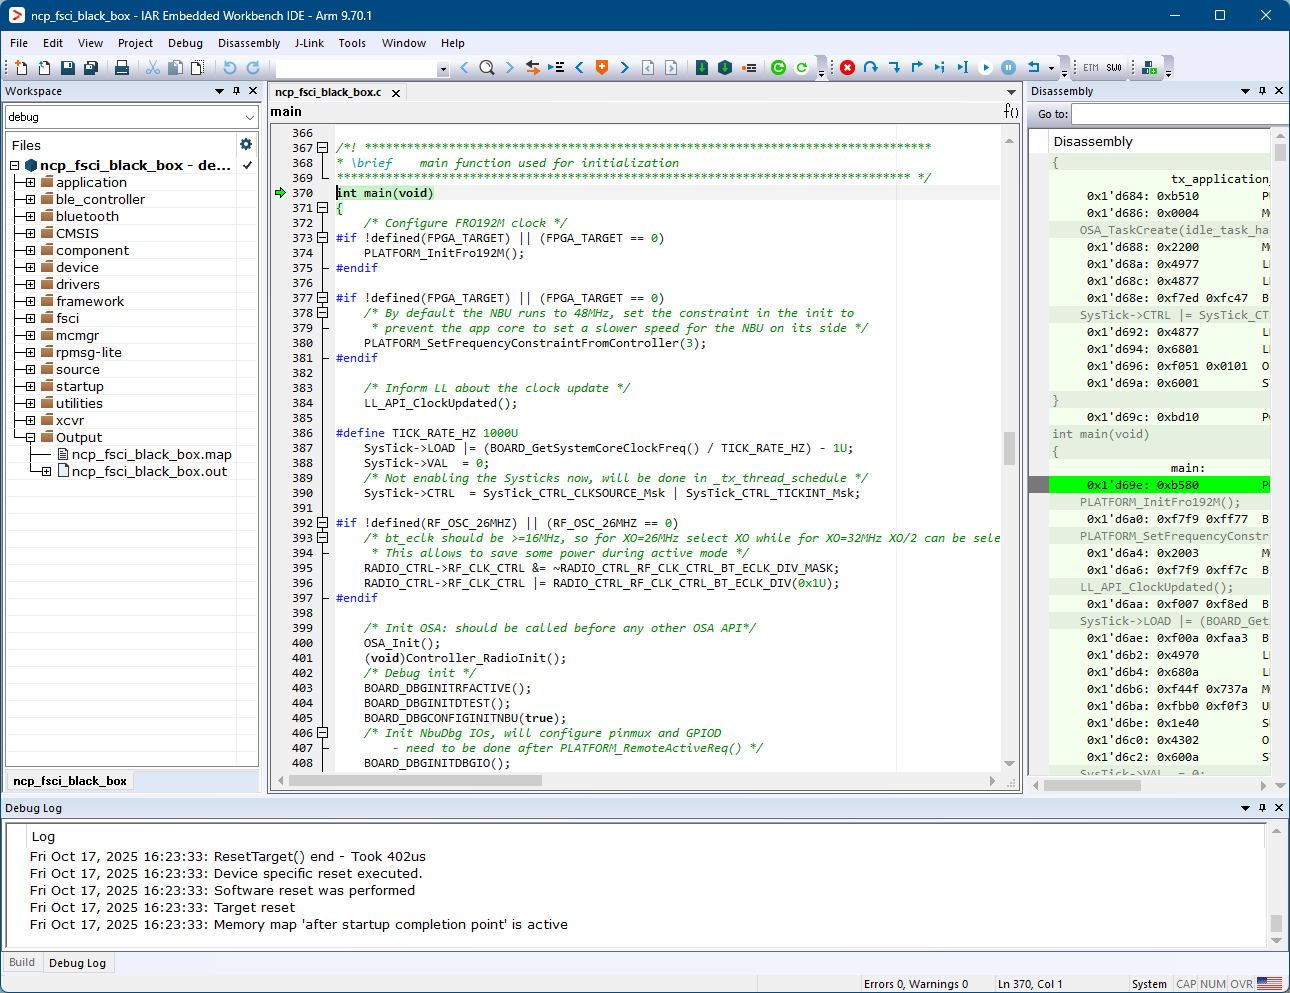
Press Go (F5). At this moment, the board starts running the application.
Running the code on IAR
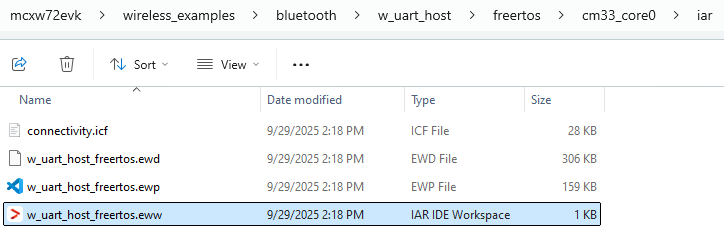
Open the Core0 IAR workspace file (
*.ewwfile format) highlighted file in the figure below.Wireless UART Host IAR demo project location
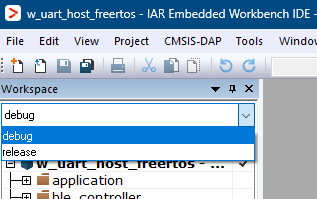
Choose between Debug and Release configurations in the drop-down selector above the project tree in the workspace.
Select the desired configuration (Debug or Release)
The figure below shows the Wireless Uart Host - IAR workspace.
Wireless Uart Host - IAR workspace
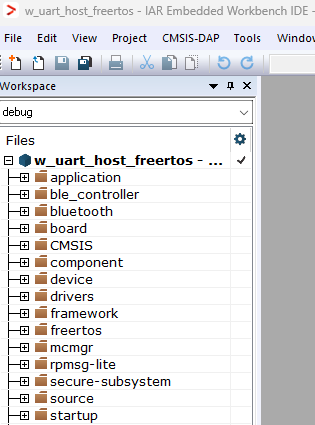
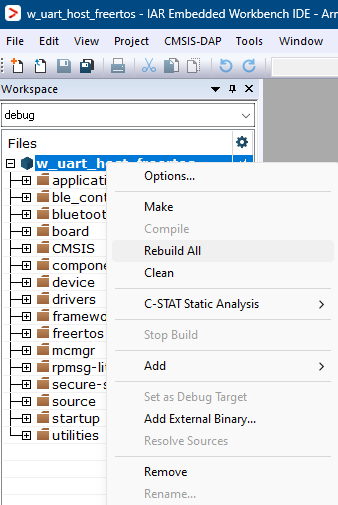
Build the Wireless Uart Host project using the options shown in the figure.
Build Wireless Uart Host application
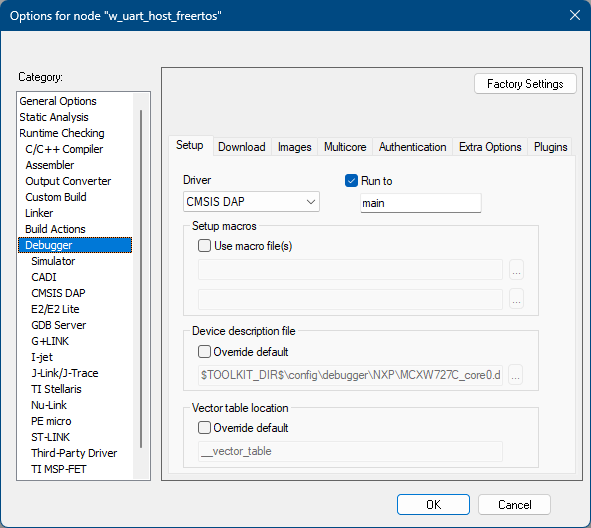
Make the appropriate debugger settings in the project options window, as seen in the next figure.
Go to: Project > Options (Alt+F7) > Debugger > Setup (tab) > Driver > J-Link/J-Trace
Debugger Settings for the Wireless Uart Host project
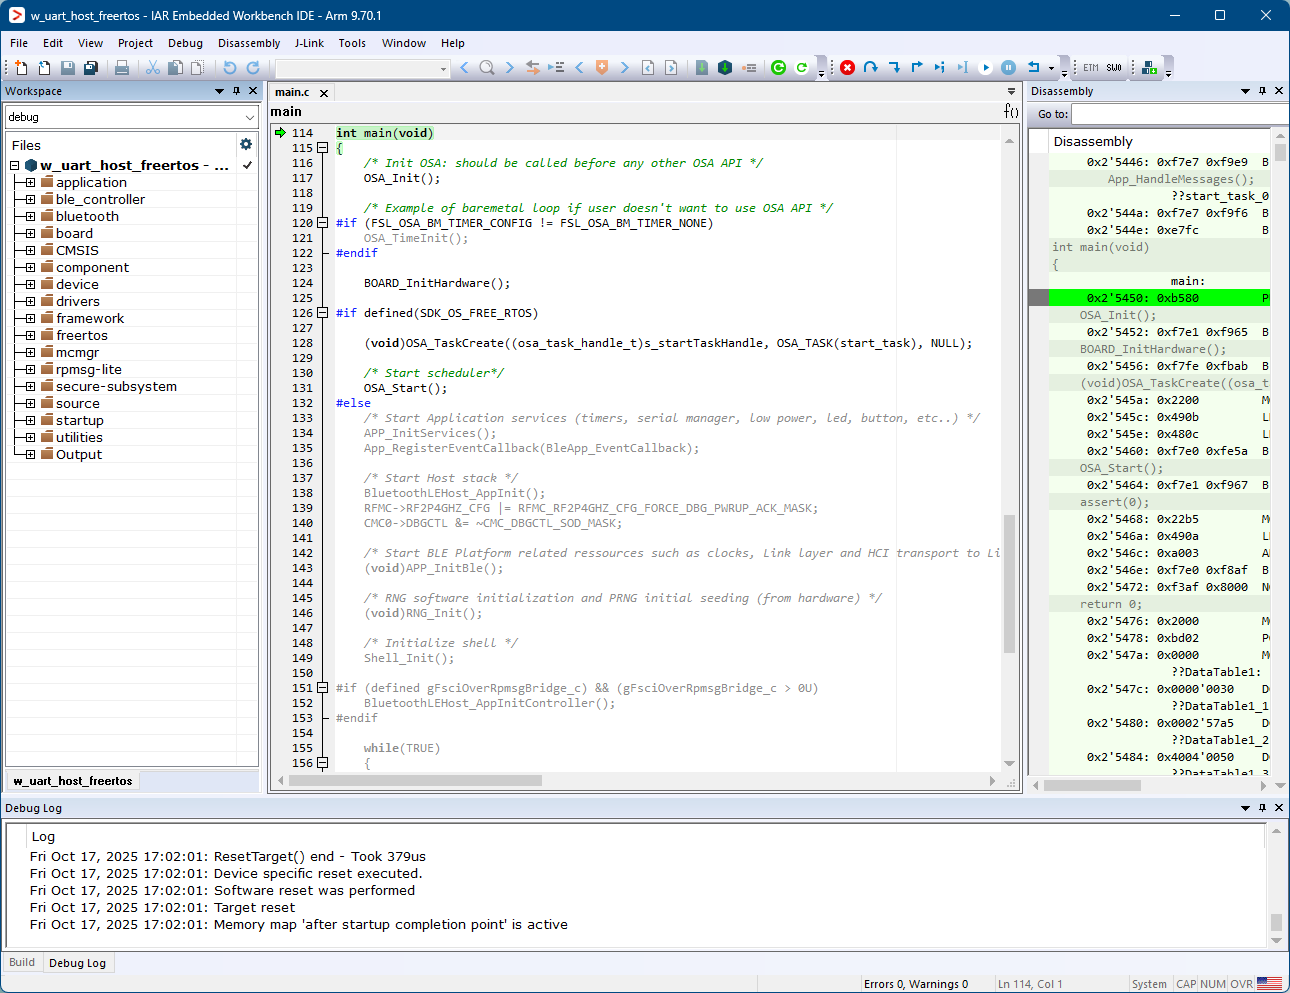
Click the “Download and Debug” button (or CTRL+D) to flash the executable onto the board.
Download and Debug the Wireless Uart Host application
Press Go (F5). At this moment, the board starts running the application.
Running the code on IAR
Parent topic:Building the binaries
Building and flashing the BLE Extended NBU software demo applications using Visual Studio Code#
To build and flash the BLE software demo applications using Visual Studio Code, follow the steps listed below:
Open Visual Studio Code and open the MCUXpresso for Visual Studio Code extension as shown in the figure below.
MCUXpresso for Visual Studio Code extension
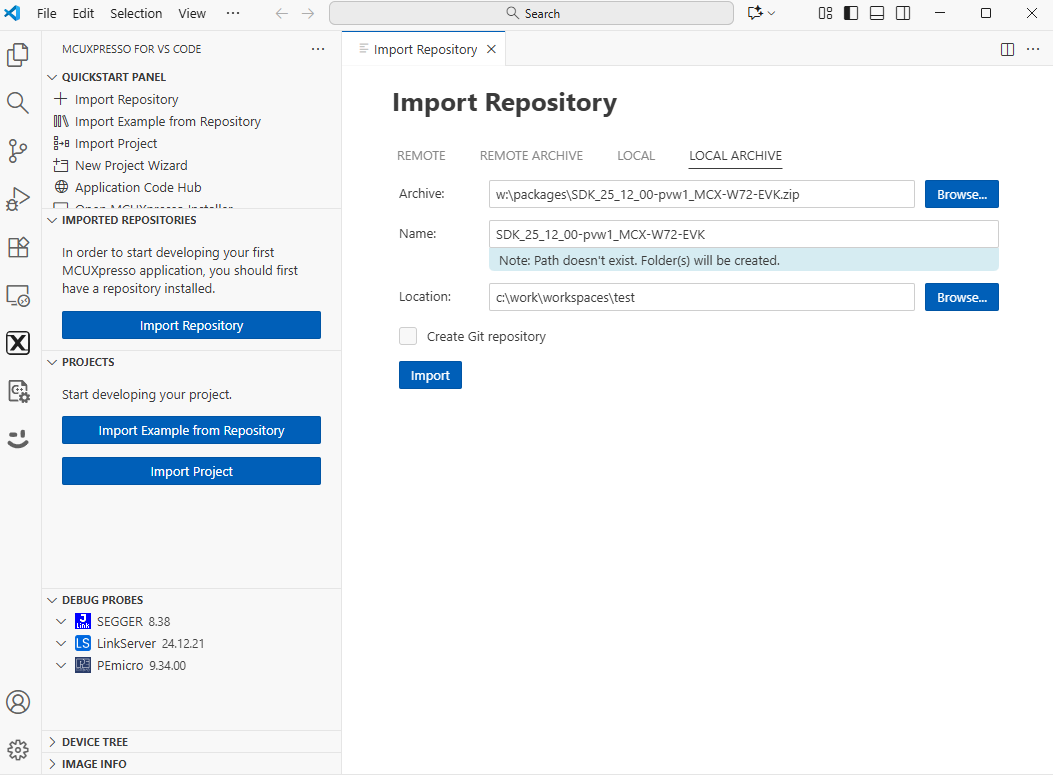
Import the SDK package: click “Import Repository”. Then, choose the “Local” option (if the SDK is archived use “Local archive”), browse to the path of the SDK you want, and click “Import”.
Steps to import the SDK
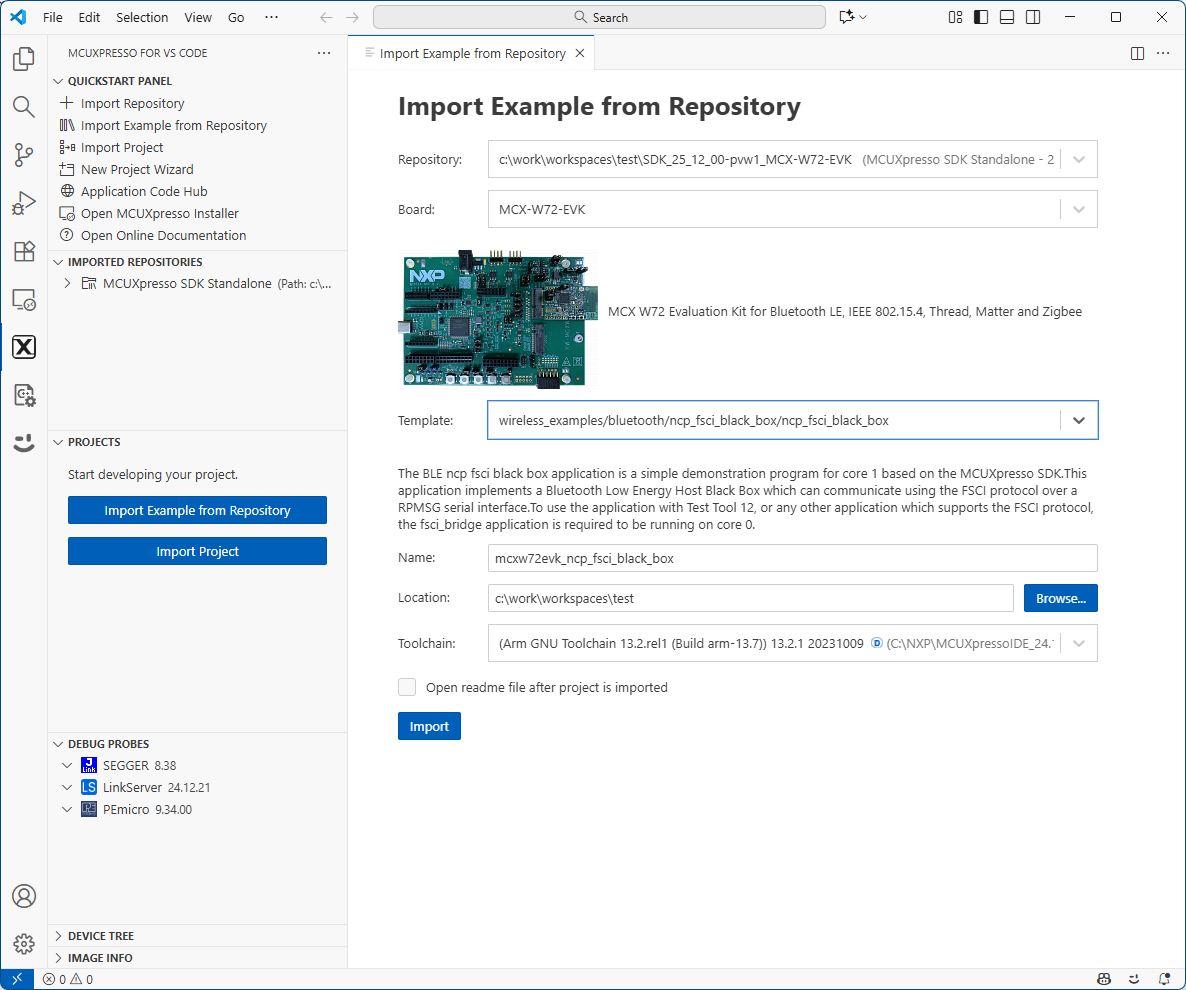
Import NCP(Core1) application: After the SDK is loaded successfully, select the “Import Example from Repository” to add an application to your workspace. Choose the repository, toolchain (Arm GNU), board, example you want to add, and the location where the VS Code project would be created. Then click “Import”.
Steps to import the NCP example application
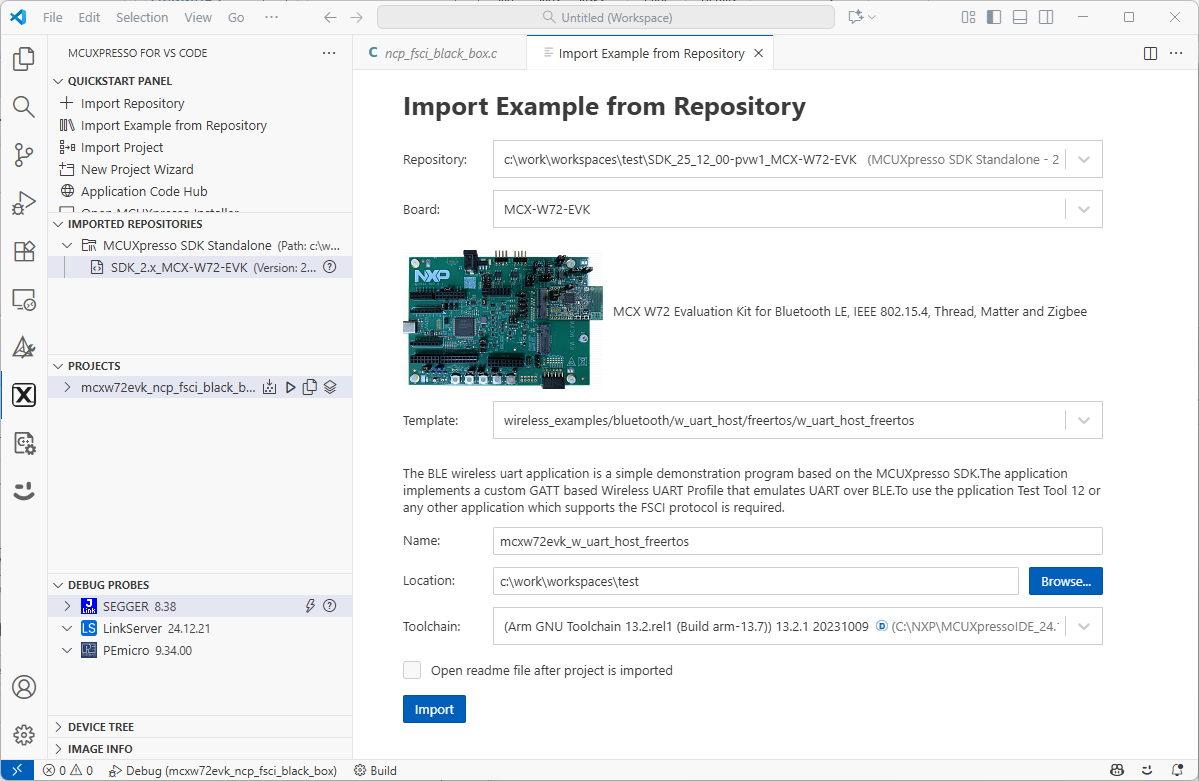
Import Core0 application: After the SDK is loaded successfully, select the “Import Example from Repository” to add an application to your workspace. Choose the repository, toolchain (Arm GNU), board, example you want to add, and the location where the VS Code project would be created. Then click “Import”.
Steps to import the Core0 example application
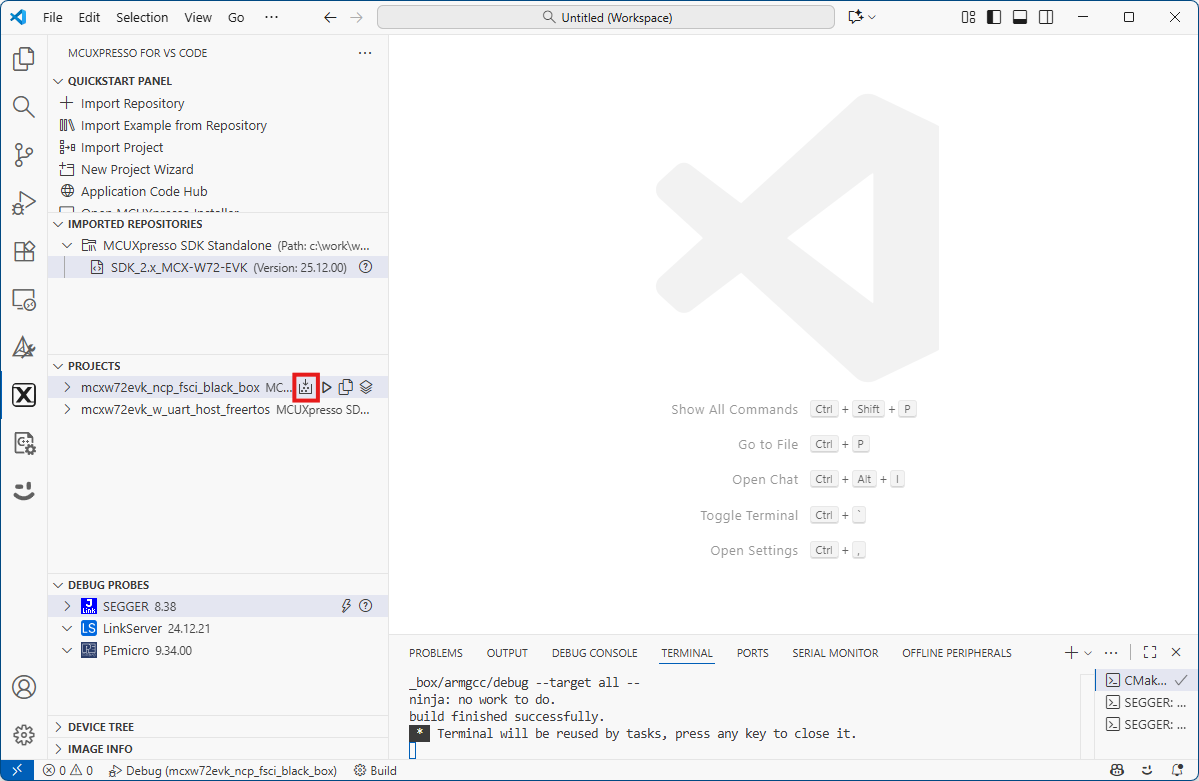
Both Extended NBU applications now appears in the “Projects” tab on the left. Build both applications by pressing the “Build selected” button on each.
Building the NCP FSCI Black Box ThreadX application
Building the Wireless UART Host Host FreeRTOS application
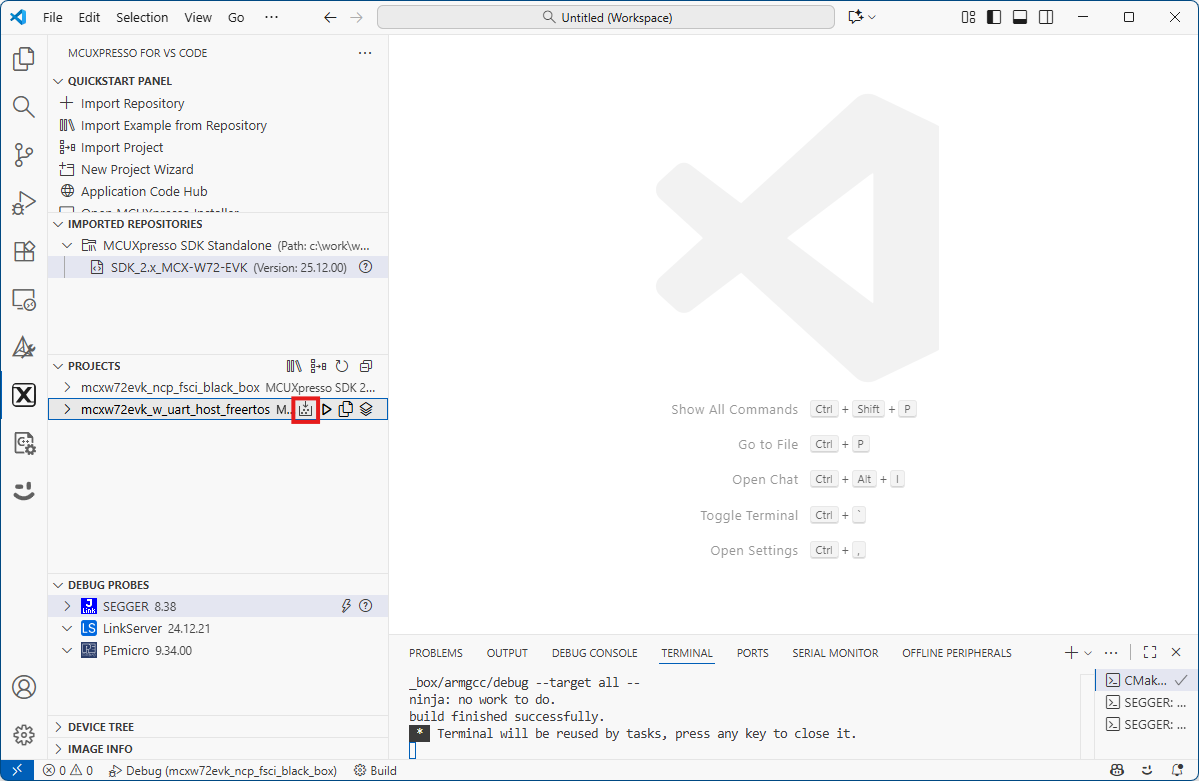
After the build is completed successfully, first debug the NBU(Core1) application by clicking the “Debug” button.
Debug the NCP FSCI Black Box ThreadX application
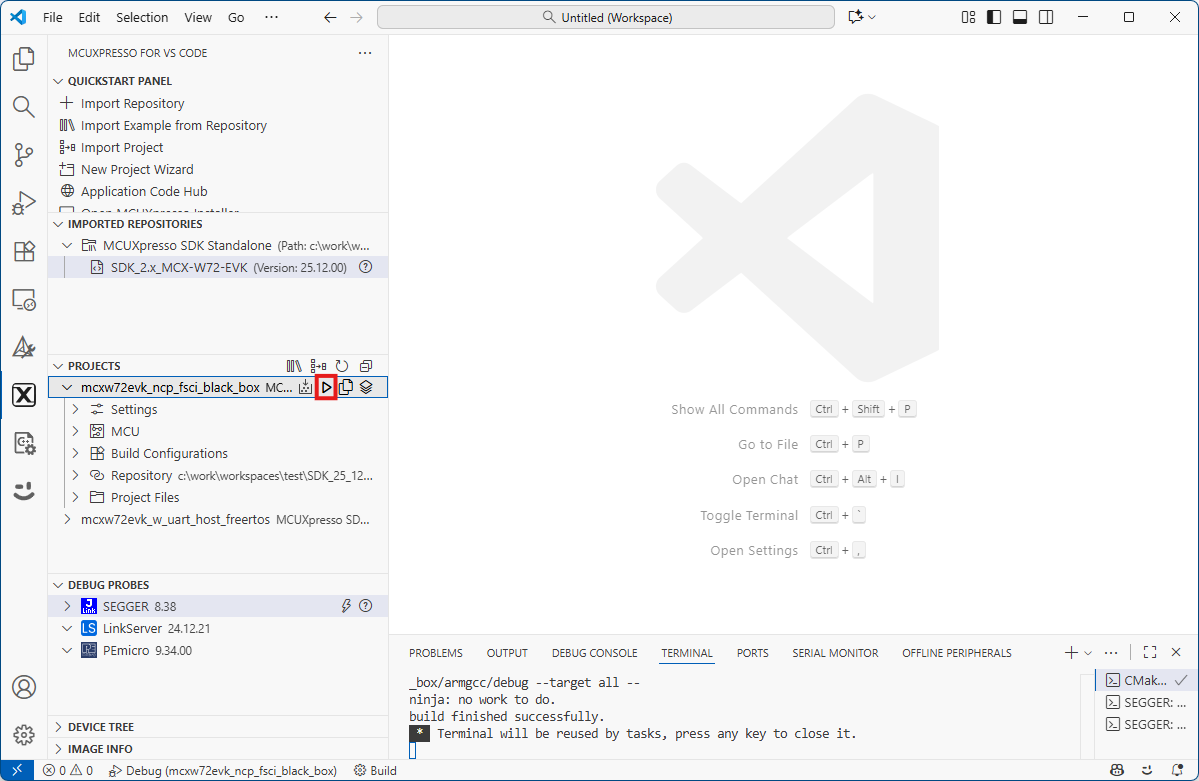
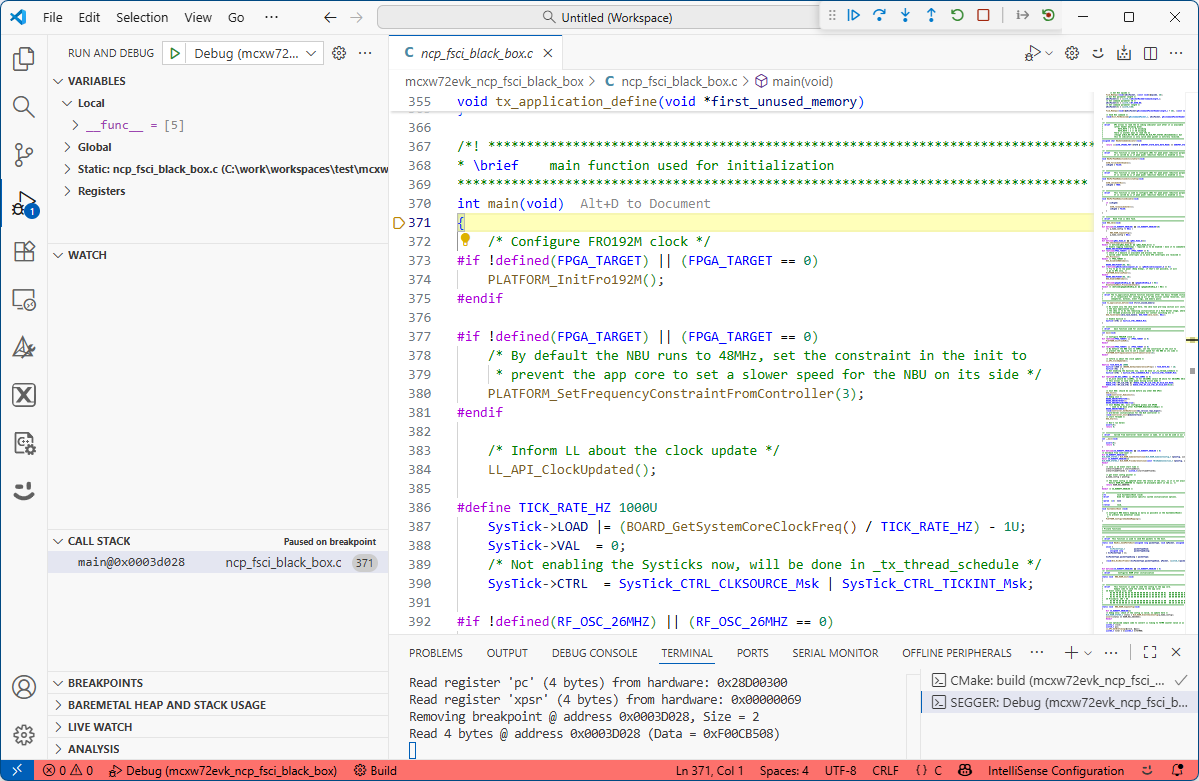
Press the run (“Continue”) button to run the application on the board.
Running the NCP FSCI Black Box ThreadX application
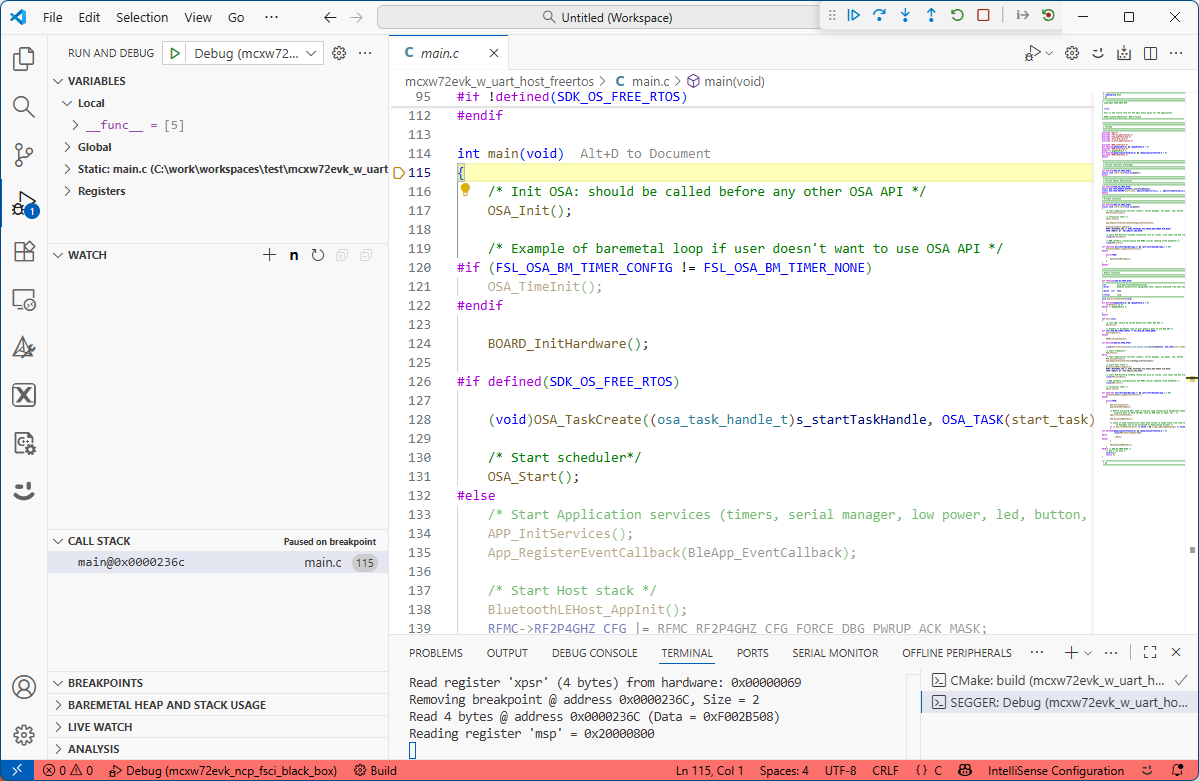
After the build is completed successfully and the NBU application was successfully written, debug the Core0 application by clicking the “Debug” button.
Debug the Wireless UART Host FreeRTOS application
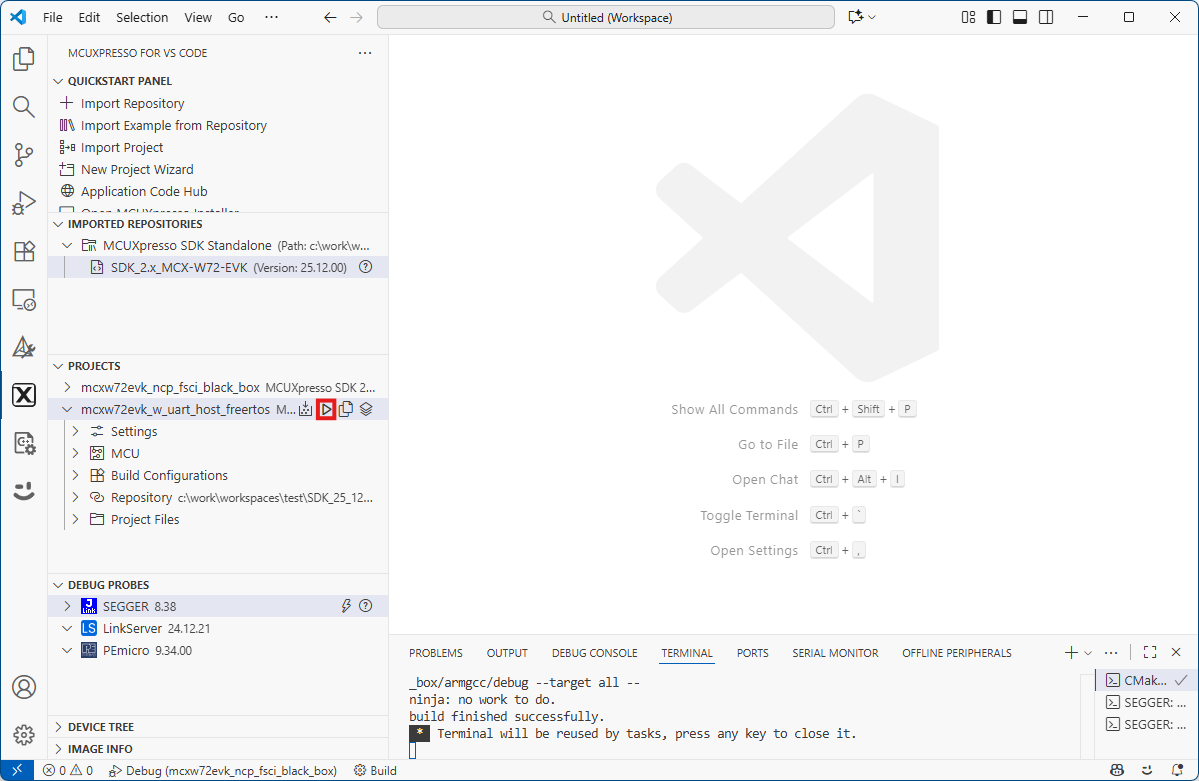
Press the run (“Continue”) button to run the application on the board.
Running the Wireless UART Host FreeRTOS application
Parent topic:Building the binaries