
Run a demo application#
This section describes the steps to download the flash.bin file to sd card and emmc memory and run the example applications provided in the MCUXpresso SDK. The hello_world demo application targeted for the i.MX 943 hardware platform is used as an example. However, these steps can be applied to any example application in the MCUXpresso SDK.
Run an example application#
For more information on debug probe support in the MCUXpresso IDE, see community.nxp.com.
To download and run the application, perform the following steps:
Ensure the host driver for the debugger firmware has been installed.
Connect the development platform to your PC via a USB cable.
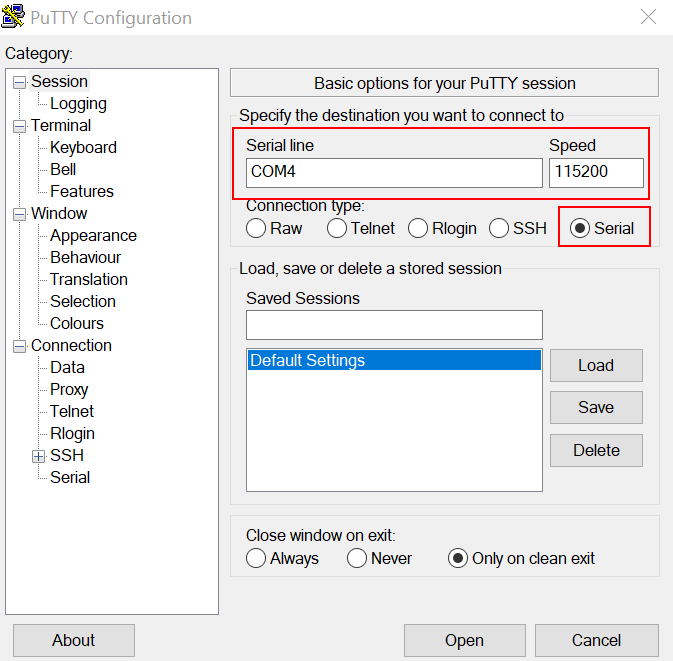
Open the terminal application on the PC, such as PuTTY or TeraTerm, and connect to the debug serial port number (to determine the COM port number, see How to determine COM port. Configure the terminal with these settings:
115200 or 9600 baud rate, depending on your board (reference
BOARD_DEBUG_UART_BAUDRATEvariable inboard.hfile)No parity
8 data bits
1 stop bit
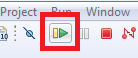
On the Quickstart Panel, click Debug to launch the debug session.
The first time you debug a project, the Debug Emulator Selection dialog is displayed, showing all supported probes that are attached to your computer. Select the probe through which you want to debug and click OK. (For any future debug sessions, the stored probe selection is automatically used, unless the probe cannot be found.)
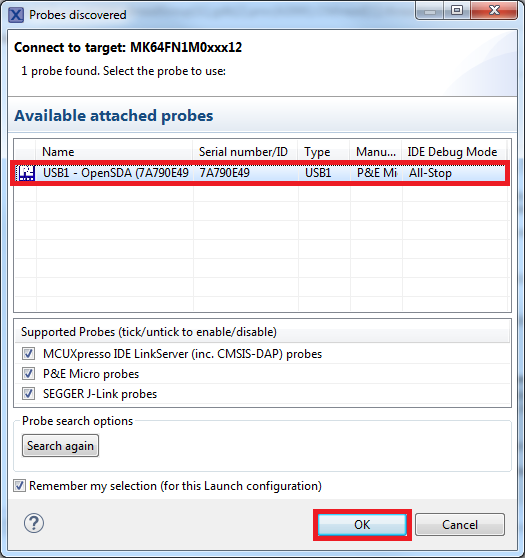
The application is downloaded to the target and automatically runs to
main().Start the application by clicking Resume.
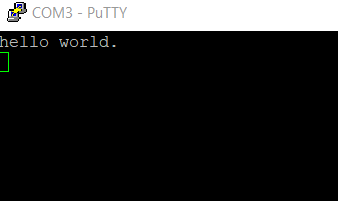
The hello_world application is now running and a banner is displayed on the terminal. If not, check your terminal settings and connections.
Generate a flash.bin#
Get the basic images and the imx-mkimage source repository from corresponding Linux BSP release. These below basic images can to be put into imx-mkimage/iMX94:
- oei-m33-ddr.bin- m33_image.bin m33_image-mx94alt.bin: this image is generated by the command:make config=mx94alt all; m33_image-mx94evk.bin: this image is generated by the command:make config=mx94evk all`;- m70_image.bin (demo binary name for cortex-m7 core0 in M7MIX0)- m71_image.bin (demo binary name for cortex-m7 core1 in M7MIX1)- m33s_image.bin (demo binary name for cortex-m33 core1 in NETCMIX)- <lpddr type name>_dmem_qb_v202409.bin(lpddr type name: lpddr5)- <lpddr type name>_dmem_v202409.bin- <lpddr type name>_imem_qb_v202409.bin- <lpddr type name>_imem_v202409.bin- u-boot.bin- u-boot-spl.bin- bl31.bin- tee.bin- mx943a0-ahab-container.imgNote:
mx94evk.cfg for
m33_image.binof System Manager is used for examplesrpmsg_lite_pingpong_rtos_linux_remote,rpmsg_lite_str_echo_rtos_remote.mx94alt.cfg for
m33_image.binof System Manager is used for almost other examples.
Copy the binary built by ARMGCC/IAR into imx-mkimage/iMX94 and rename the file name to m70_image.bin or m71_image.bin or m33s_image.bin(depending on the demo binary).
Generate flash.bin.
make SOC=iMX94 OEI=YES flash_all LPDDR_TYPE=lpddr5(Boot up Cortex-A cores and Cortex-M cores[cortex-m33 core1, cortex-m7 core0, cortex-m7 core1])
or
make SOC=iMX94 OEI=YES flash_m33s_m70_m71 LPDDR_TYPE=lpddr5(Boot up Cortex-M cores[cortex-m33 core1, cortex-m7 core0, cortex-m7 core1])
Note:
For IMX943 OrangeBox, use the following command:
make SOC=iMX94 OEI=YES flash_m33s_m70_m71 LPDDR_TYPE=lpddr5
or
make SOC=iMX94 OEI=YES flash_all LPDDR_TYPE=lpddr5
Use the below valid combination of demos to avoid resource conflict:
Any demo on cm33_core1, hello_world demo on cm7 core0 and cm7 core1
Any demo on cm7_core0, hello_world demo on cm33 core1 and cm7 core1
Any demo on cm7_core1, hello_world demo on cm33 core1 and cm7 core0
Burn flash.bin to MicroSD/eMMC at 32 K(0x8000) offset with dd or HxD or UUU and then plug the MicroSD card to the board.
For example:
Burn flash.bin into Micro SD card with dd
dd if=flash.bin of=/dev/sdh bs=1k seek=32 && syncBurn flash.bin into SD/eMMC with UUU
Connect the USB Type-C port to the PC through a USB cable. It is used for downloading the firmware of the board.
Switch to the serial downloader mode(USB1) by setting
SW10[1:4] = x001. The used boot core is cortex-m33 core0.Burn flash.bin with uuu using one of the following commands:
For emmc, use:
uuu -b emmc imx-boot-imx943-orangebox-sd.bin-flash_all flash.binFor sd, use:
uuu -b sd imx-boot-imx943-orangebox-sd.bin-flash_all flash.bin
Note:
flash.bin. The flash.bin is generated by the third step(Generate flash.bin).
Change the boot mode to
SW10[1:4] = x011for sd boot andSW10[1:4] = x010for emmc boot.Power on the board.
Parent topic:Run a demo application
Debug an demo application with IAR#
To debug an application with IAR, perform these steps:
Get the patch for IAR and Segger J-Link, install it as readme in the patch.
burn a flash.bin to board, see Run a demo application, make sure the size of M7 binary in flash.bin not less than the binary you want to debug.
power on the board, make sure the M7 is booted by SM
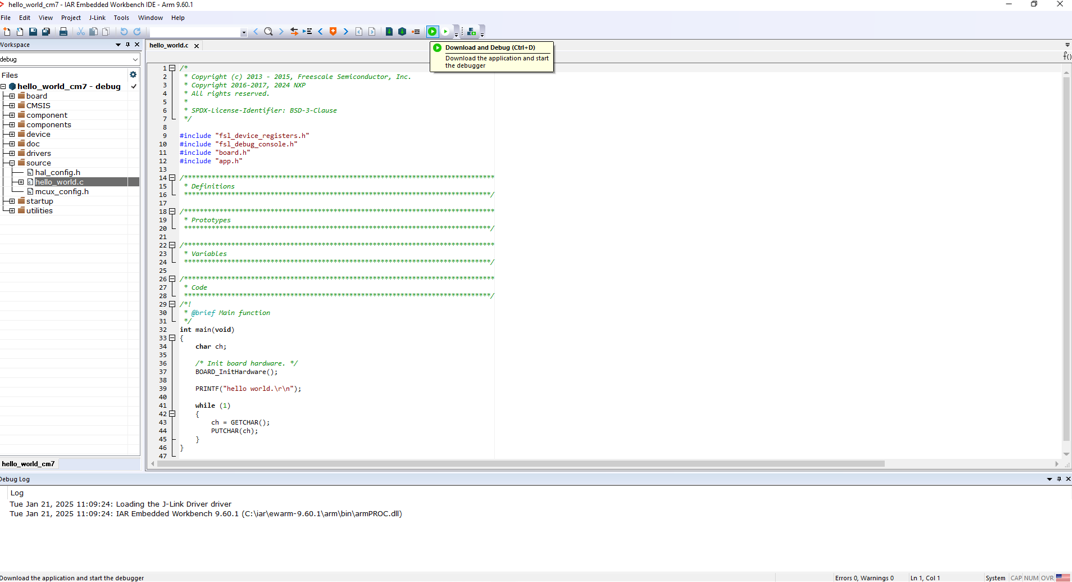
Open hello world example with IAR, click download and debug to debug
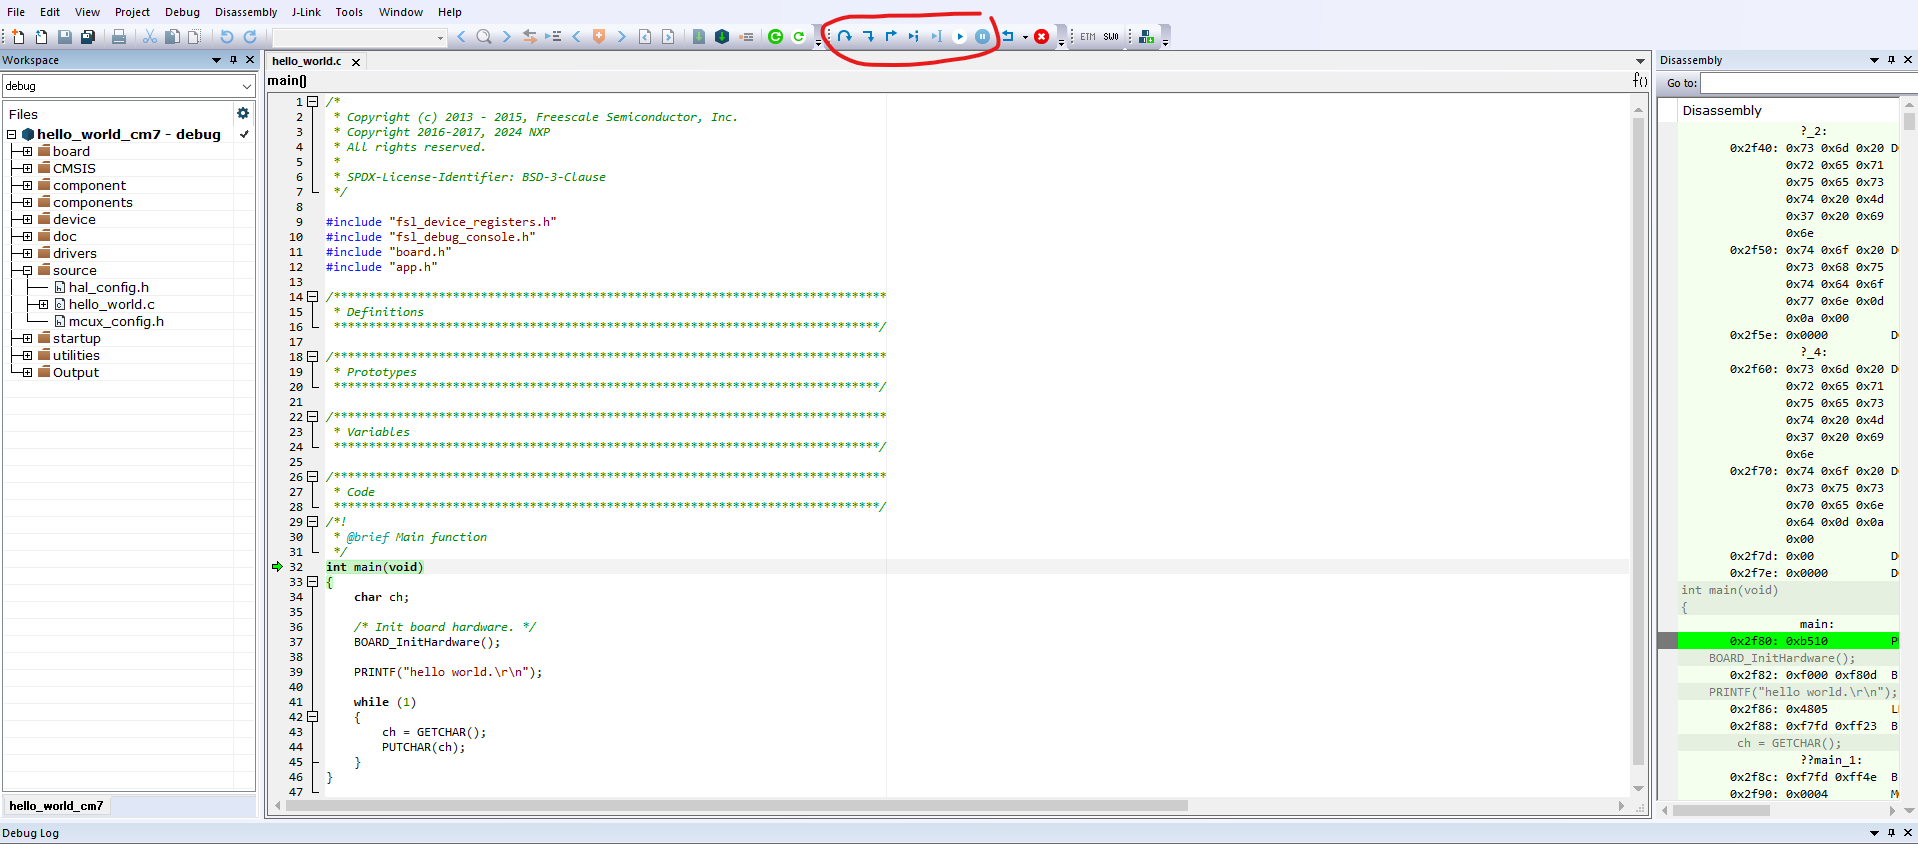
click button such as step over to debug
Parent topic:Run a demo application