Quick Start Guide#
This chapter describes the basic workflow to get started with GUI Guider.
Create a new project#
GUI Guider offers two common ways to create a new project.
Use the Create option for a quick setup. This method is suitable when the project configuration is already known.
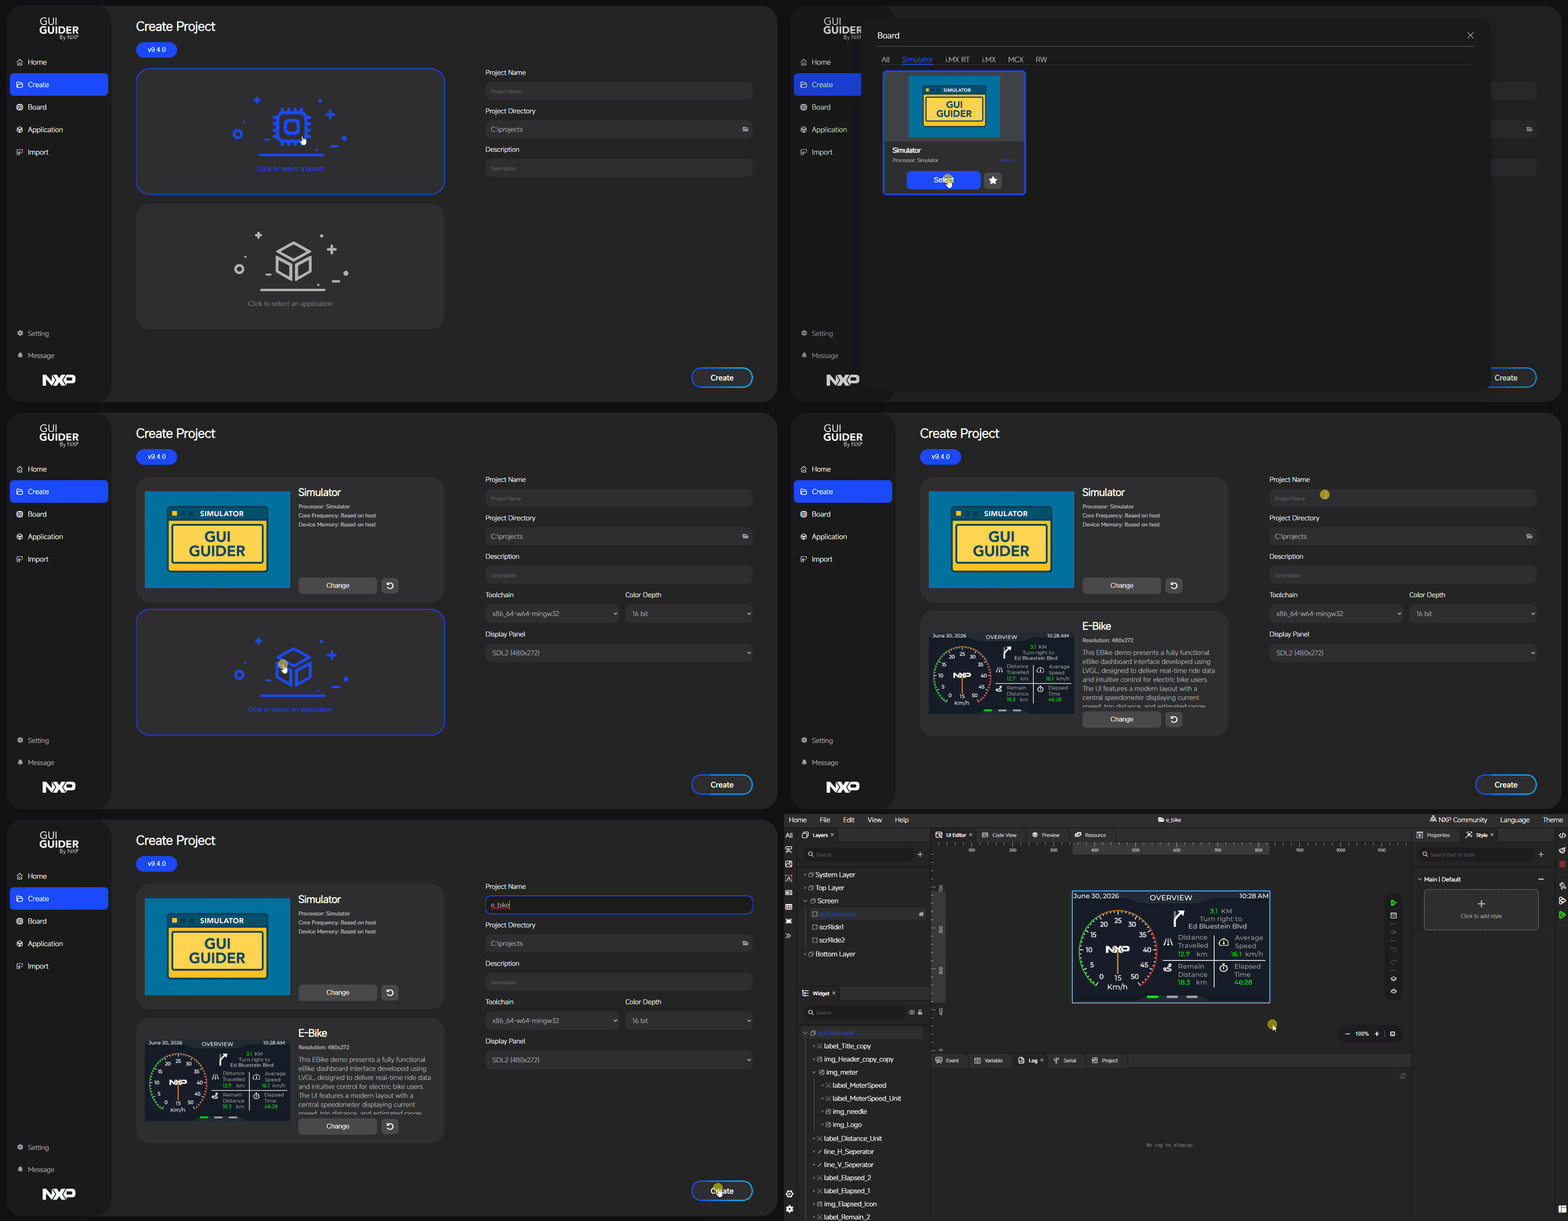
The second method is to enter the creation flow from either the Application or the Board side. This method is useful when you already know the target board or application type. It helps narrow the available choices before you complete project creation.
In the current workflow, Board and Application can be combined as a two-way filtering process. You can start by selecting a board and then view only the applications compatible with that board. Alternatively, start by selecting an application and then view only the boards that support it. This approach filters valid board–application combinations and prevents invalid selections.
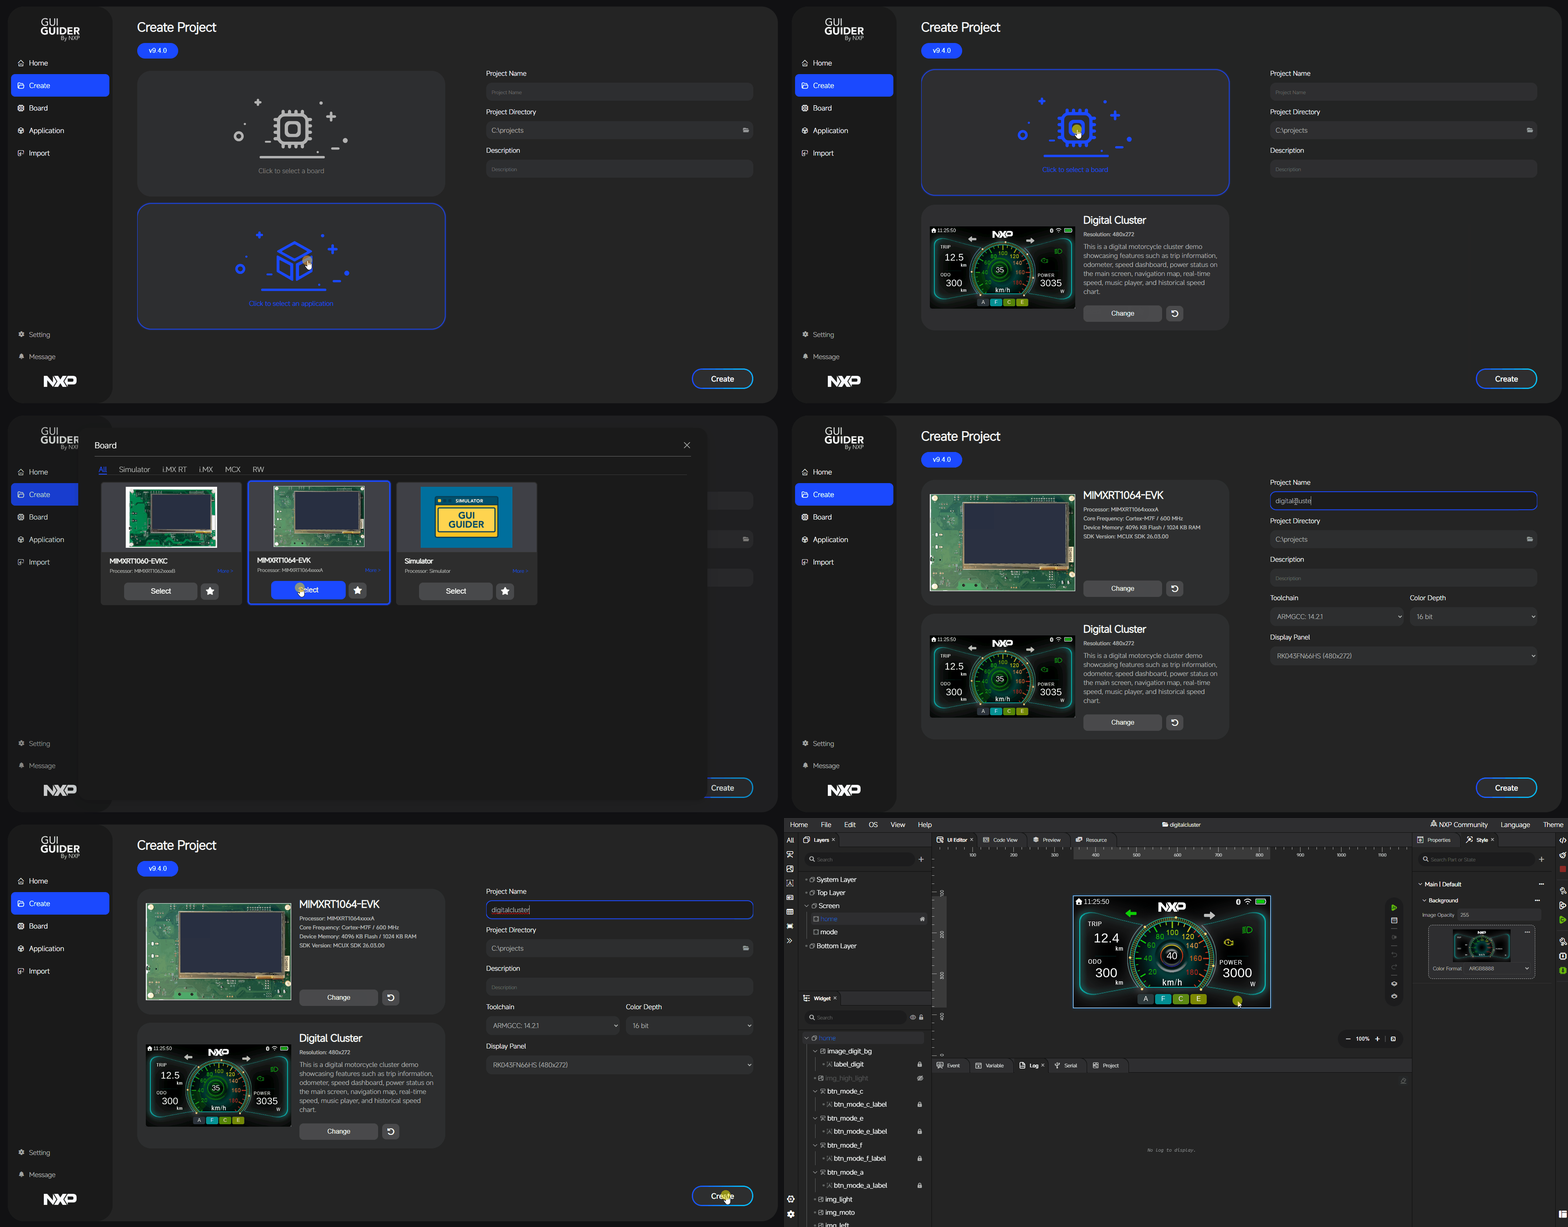
Once the project is created, GUI Guider initializes the project structure and opens the workspace. Now, you can continue with screen design, resource setup, and code generation.
Import an existing project#
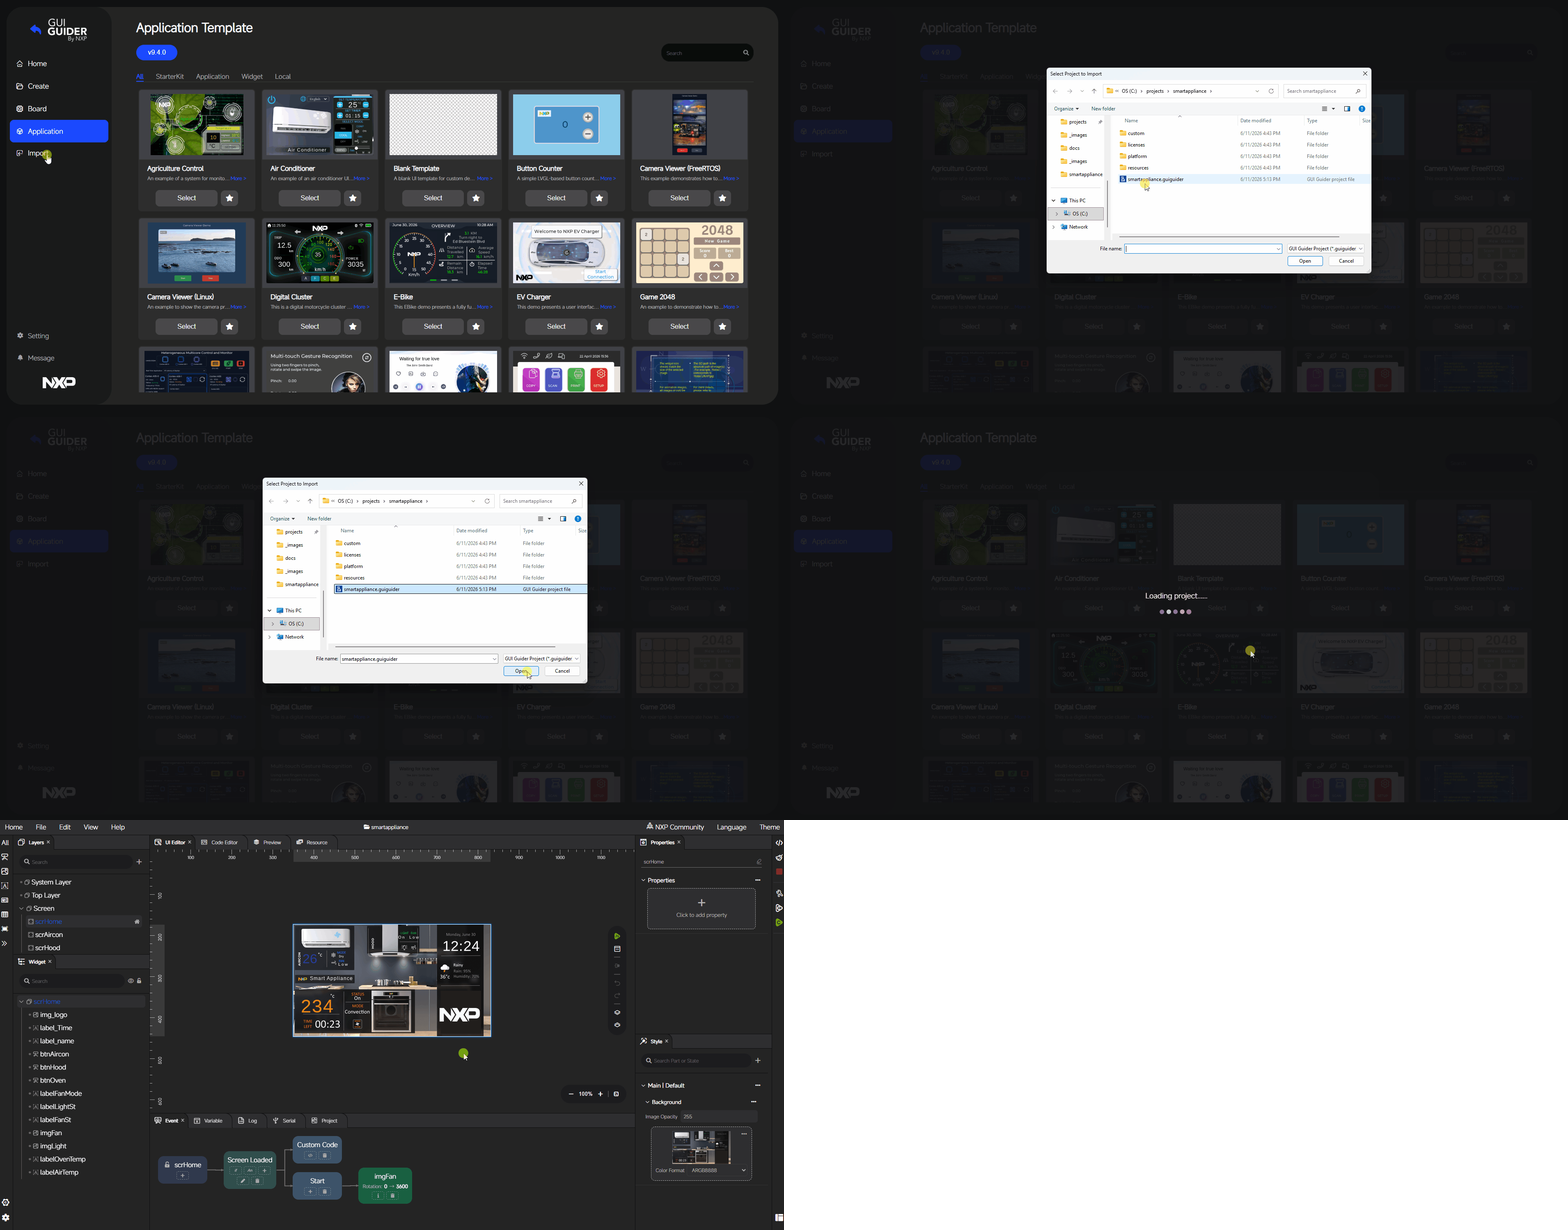
You can also import a project created by another user or stored in a different location.
When a project is imported, GUI Guider opens it, adds it to the recent projects list, and retains its original path.
Design a simple UI#
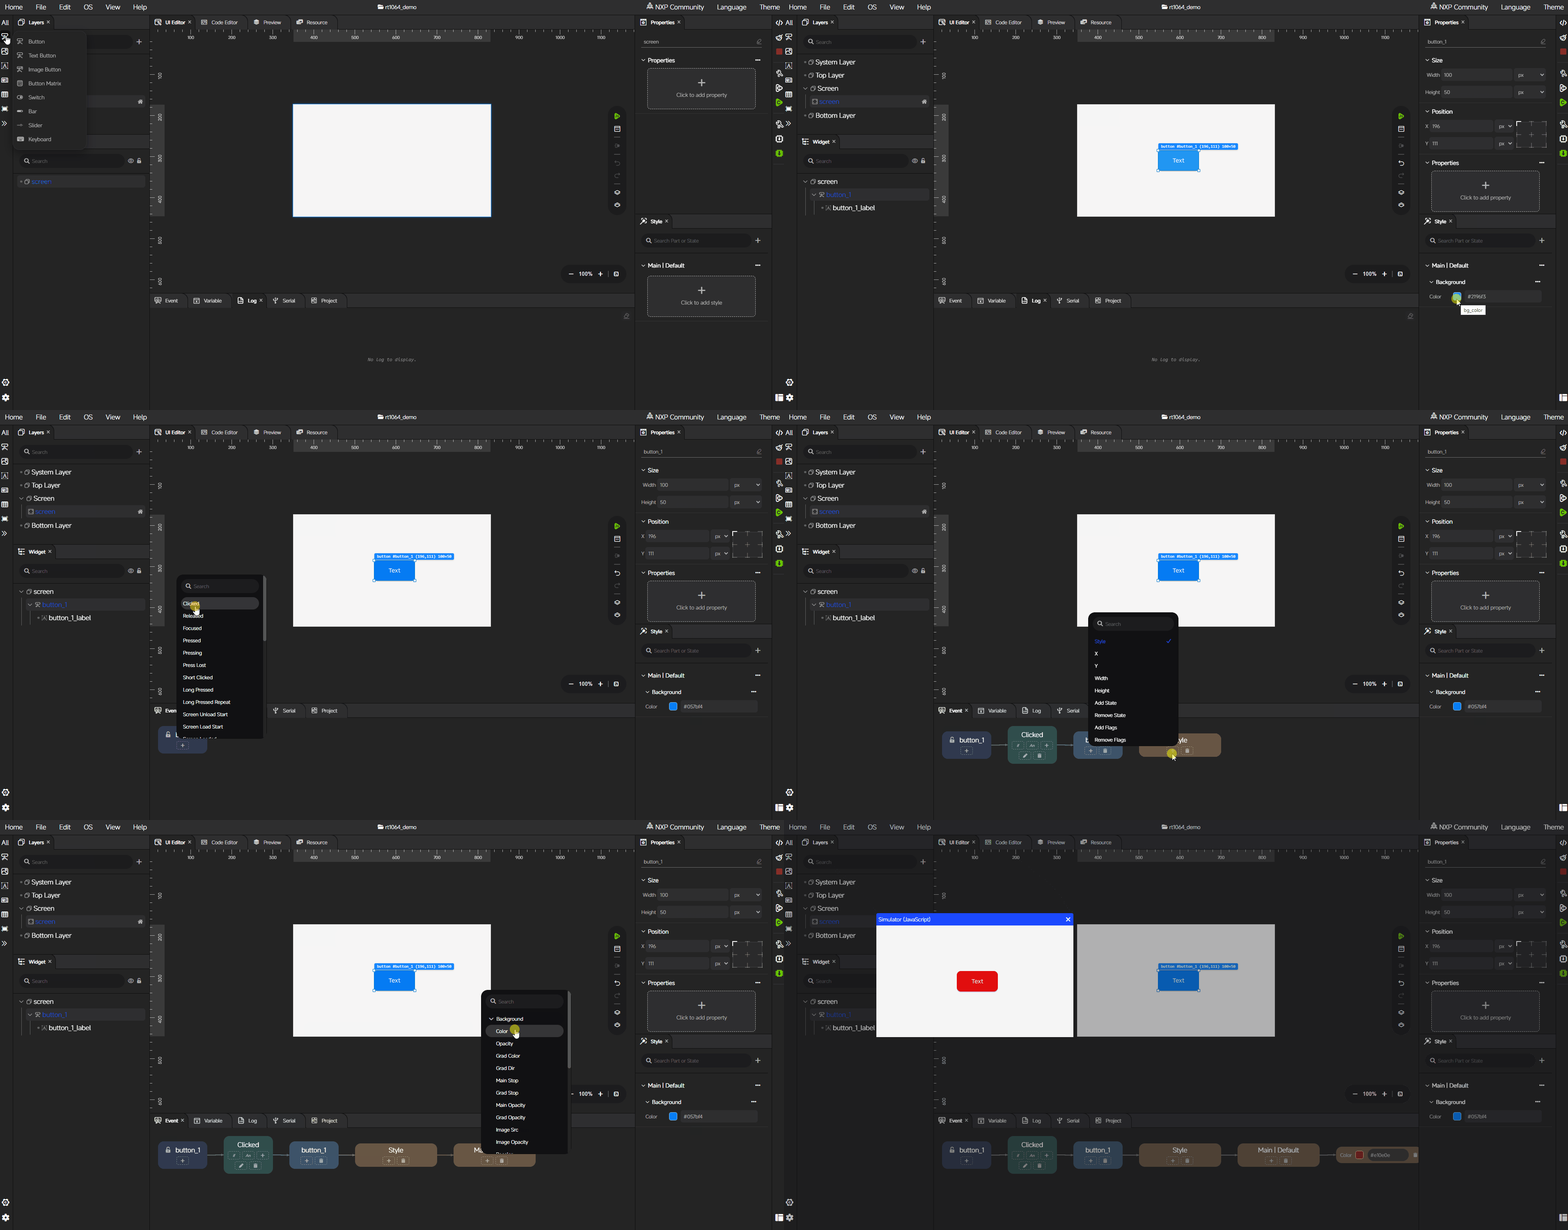
After creating or importing a project, build a small and simple UI. This example helps you understand the editor layout and widget placement. It also introduces properties editing, style configuration, and event setup.
The example used in this step is intentionally simple but practical. First, modify the background color of a button. Then add an event. Clicking the button changes its background color. This walkthrough covers both the visual property configuration flow and the basic event-driven interaction flow in GUI Guider.
Generate code#
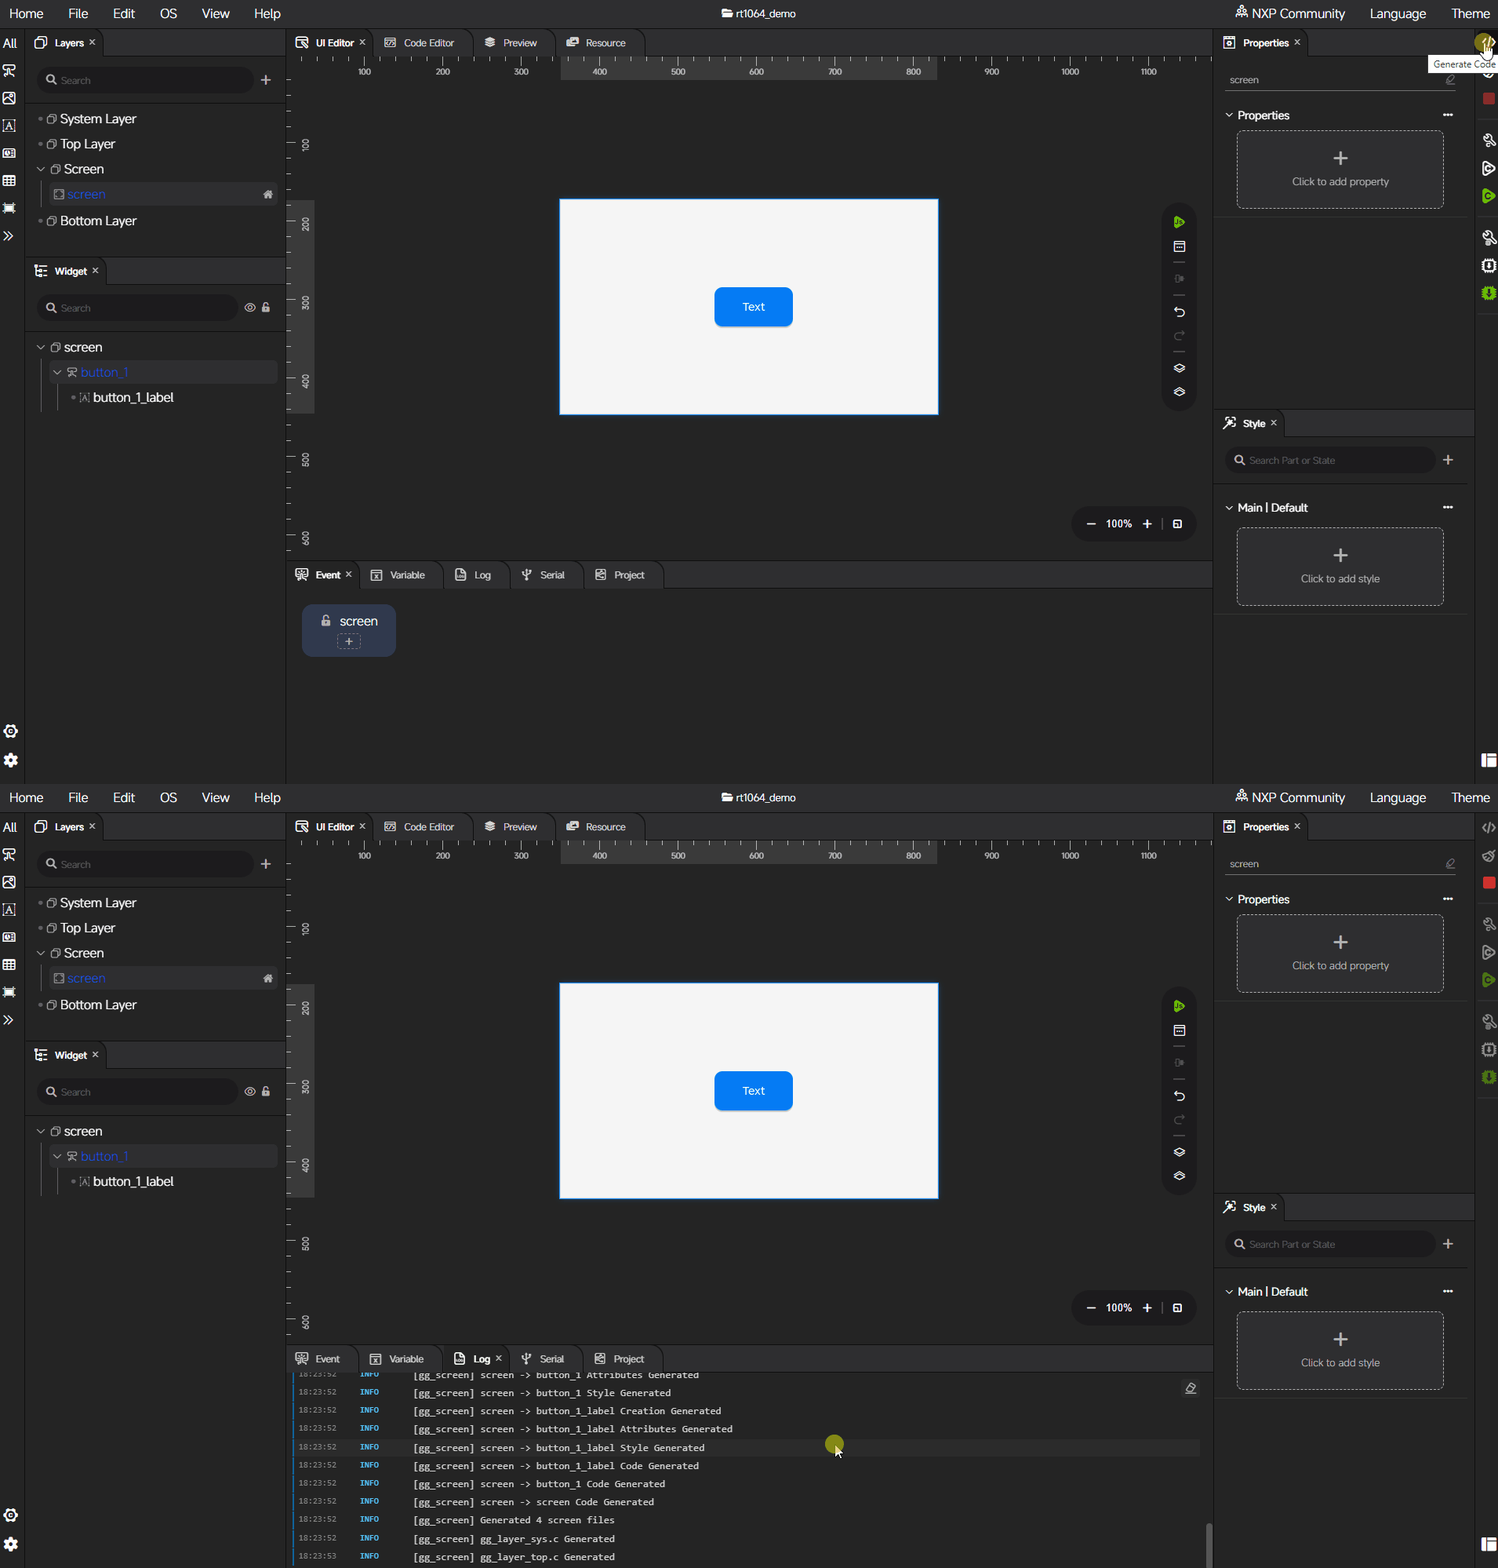
After the basic UI structure is ready, generate code from the project. This step converts the current GUI design, project configuration, and resources into output. This output runs in the target software environment.
Code generation marks an important transition point between visual design and embedded development. After generation completes, proceed to simulator validation. You can also proceed to target-side integration.
Build and run on simulator or target#
After code generation, the next step is to validate the project in an executable environment. GUI Guider supports a workflow that first verifies behavior in the simulator and then continues to validation on real hardware.
Simulator#
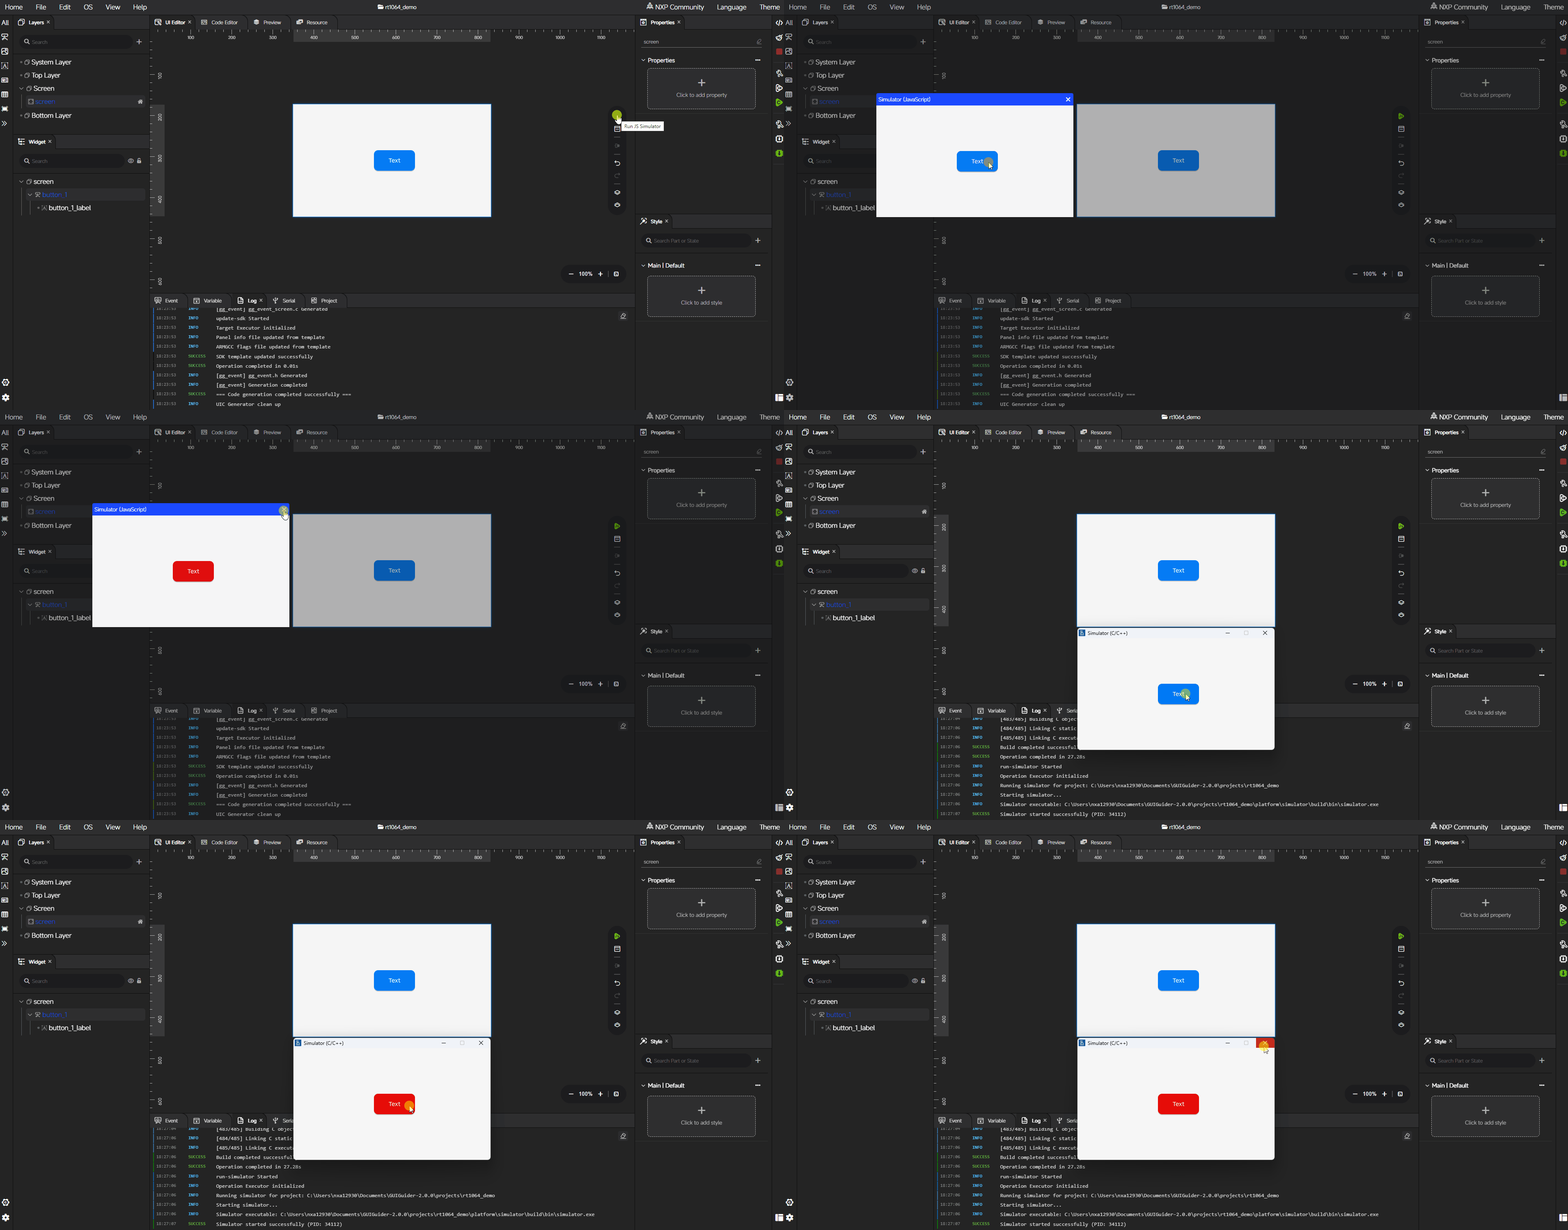
The simulator is useful for quick validation before hardware deployment. It lets you check screen flow, layout, and basic interactions. It also helps identify visible runtime issues without a full target build.
GUI Guider provides two simulator options: the JS Simulator and the C Simulator.
The JS Simulator does not require compilation and can display the designed UI quickly. This makes it well suited for fast visual validation during early design work. This simulator does not run the full compile and runtime process. It cannot fully reflect content that depends on custom code.
The C Simulator requires the full build process. This option is closer to actual project execution. It confirms that the generated code, runtime behavior, and integration result match the target board.
Use the simulator early to shorten iteration time. It helps identify UI or resource issues before board-level testing.
Target#
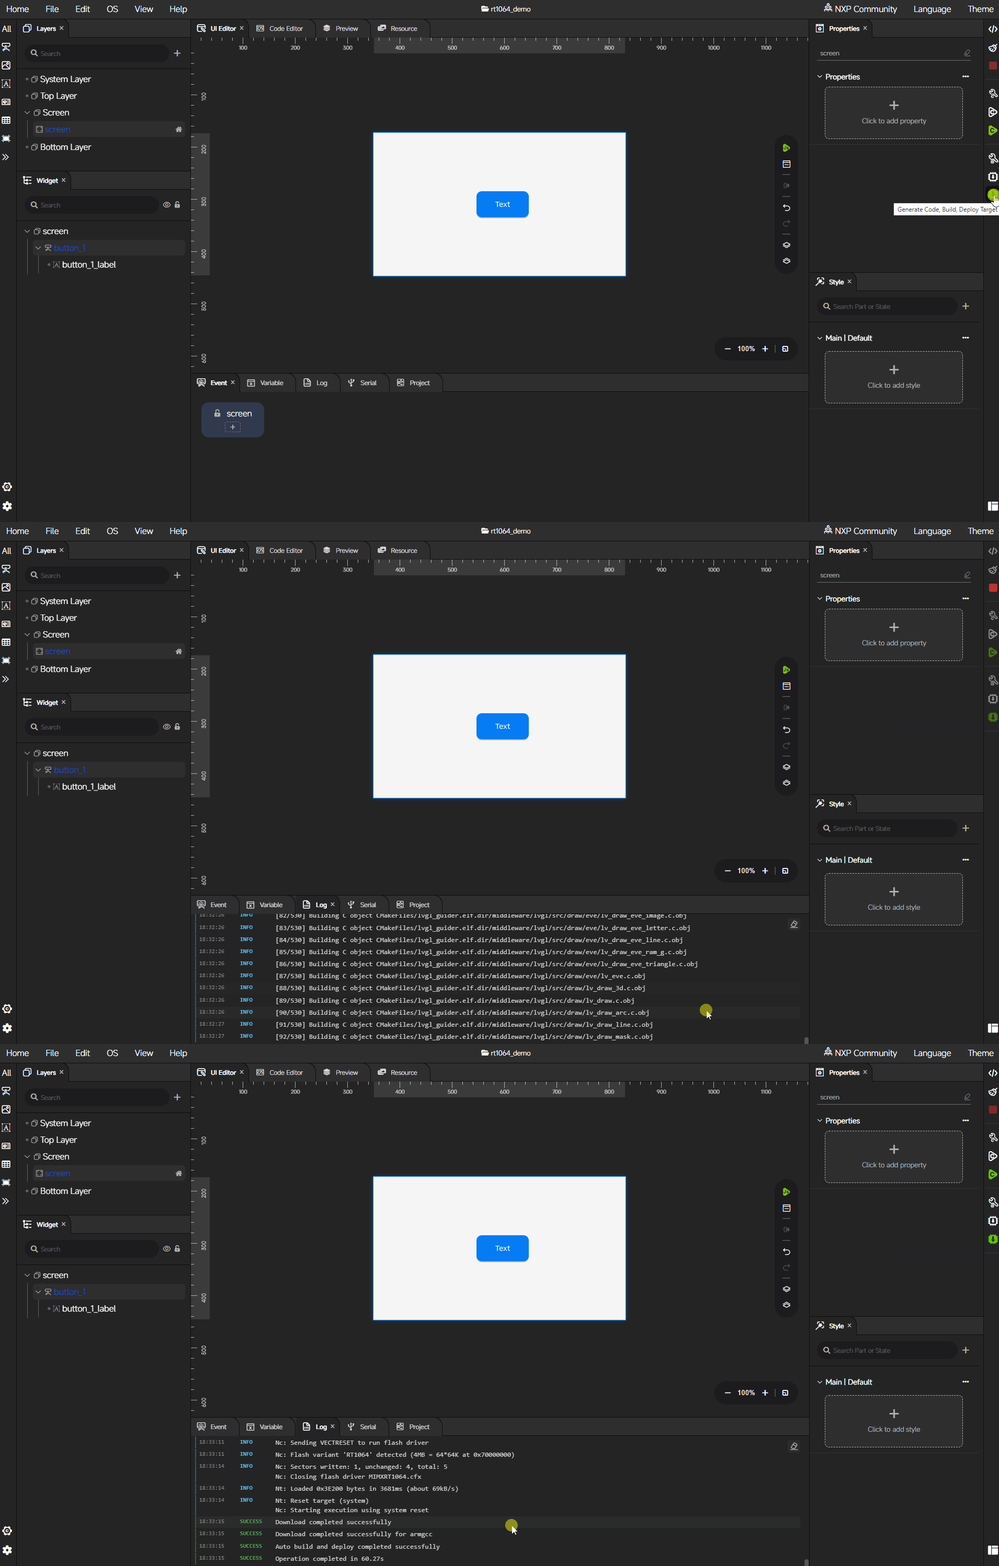
Target validation is the final step in the quick start flow. Deploy the generated project to the target hardware. Confirm display behavior, runtime integration, and project readiness.
When creating a project, select the toolchain that matches your development preferences. The user experience may vary slightly between toolchains, but the overall workflow remains the same.
This section uses ARMGCC as an example. GUI Guider supports a one-click workflow. It generates code, builds the application, downloads it to the target board, and runs it.