MCX Lab Facial Recognition
Objectives
In this lab, you will learn:
How to import an example in the VS Code workspace using Application Code Hub
How to build, clean, debug, and run the example
How to connect the Serial Monitor for UART console
How to navigate and edit files in the Explorer view
How to modify project/code related to the Neural Processing Unit (NPU)
Facial Recognition Lab
After successfully installing the VS Code extension for MCUXpresso, let’s go through the detailed steps to use NXP’s Application Code Hub to run the Facial Recognition Lab on MCX FRDM board.
1. Verify Installation
The prework instructions should be completed before starting this lab. The instructions walk through the installation for the required software.
After finishing, the system should have the following:
Visual Studio Code - Base software tool distributed by Microsoft
MCUXpresso for Visual Studio Code Extension - NXP developed extension to configure VS Code for embedded MCU development
MCXUXpresso Installer - required to install 3rd party tools for MCUXpresso projects to correctly import/build/debug.
FRDM-MCXN947 SDK 2.14.0 - required to provide software libraries for middleware and drivers referenced in the example
2. Import Project with Application Code Hub
The Application Code Hub (ACH) repository enables engineers to easily find microcontroller software examples, code snippets, application software packs and demos developed by our in-house experts. This space provides a quick, easy and consistent way to find microcontroller applications. Find more information at www.nxp.com/ach
The MCUXpresso for VS Code extension has integrated the Application Code Hub into the development environment. The extension provides an Import Wizard to simplify adding examples from the Application Code Hub. The wizard handles the steps required to clone the selected project repository.
Note: The Application Code Hub examples are delivered from GitHub at www.github.com/nxp-appcodehub The integrated viewer makes it easier for customers to explore. Alternatively, customers can manually add the projects using traditional methods to clone GitHub repositories and importing the local project folder.
Here are the steps to import a new Example from the Application Code Hub:
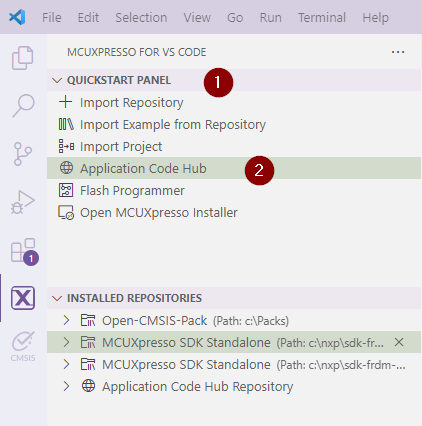
Go to the Quick Start Panel
Select Application Code Hub
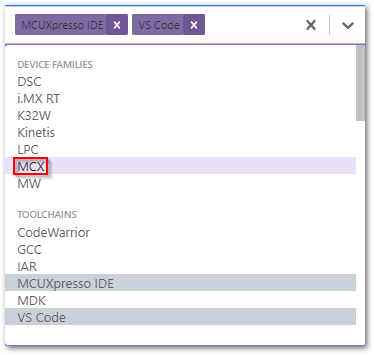
Filter visible examples (MCX + ML/AI) - Go to the filter section next to the Search bar and select two filters.
MCX in the Device Families Section and ML/AI in the Categories section of the filters.
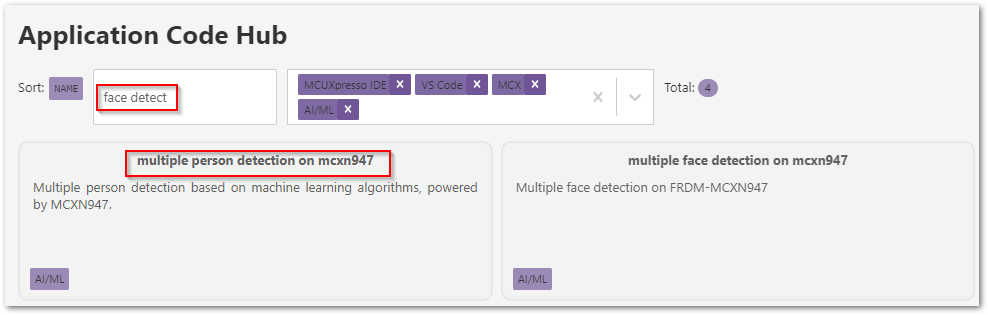
Search for Keywords in Examples
Search for the keyword ‘face detect’.
Select the demo “multiple person detection mcxn947”.
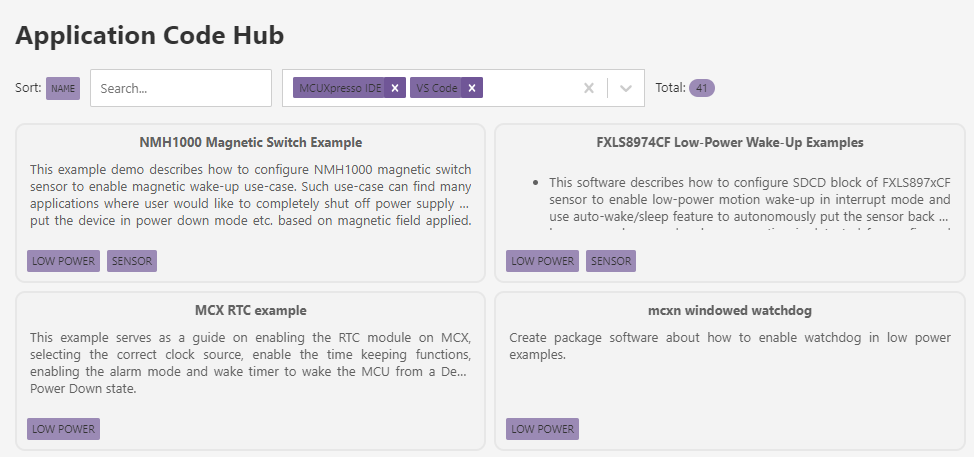
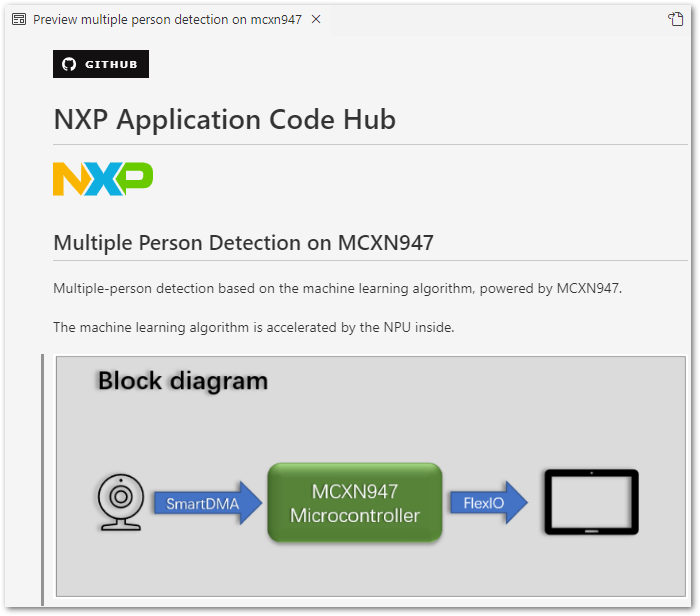
Read Overview of Facial Recognition Demo
The Application Code Hub provides a consistent Readme Overview for every project. The Facial Recognition demo overview is previewed after clicking on the application card.
Scroll through the readme to become familiar with the available contents like required hardware, software and setup instructions.
Select Destination for Project
The wizard automatically provides a prompt to browse to a desired destination folder. Choose the Folder C:\VS-Code-Projects\Facial-Recognition.

Import Project into Workspace
Select Import Project(s) after entering the desired location.
If a valid project is not available, the wizard only displays Import Repository, to allow a code repo, without a project, to be added to workspace.Select Detected Project(s)
The import wizard will scan the example repo and list valid projects that were discovered. This allows the user to select only the projects they want created. Select the mcuxpresso project listed at the top of the VS Code window below the Workspace Search bar.Choose a Toolchain
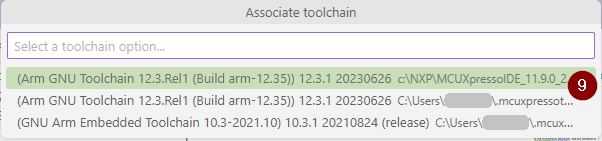
The last selection is to identify the Compiler toolchain to be used for the project. GCC will be used for this project.
Select Arm GNU Toolchain 12.2.Rel1 (Or latest version available from MCUXpresso Installer prework)
At this time the wizard completes importing the project into the workspace.
A Successful Conversion notification is displayed at the bottom of the screen. It is important to recognize that the selected Facial Detection example is a working project within the MCUXpresso IDE (Eclipse based). The VS Code extension has a ability to convert an existing project with a few requirements.

3. Navigating a Project in VS Code
The MCUXpresso for VS Code extension includes a Projects section to help users access useful project information.
A user can review and modify project information with the following steps.
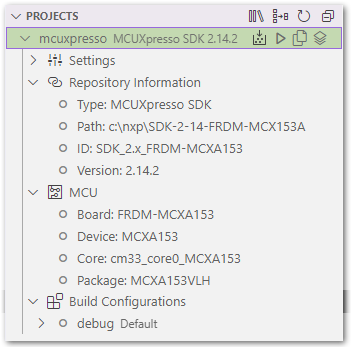
Review Project Details
Project details are shown in the Dropdown menu of the Projects Section in the MCUXpresso Extension Navigation PaneRepository Information: Verify the necesary SDK is associated with converted project.
Note: Step 2 below details how this can be corrected.
MCU: Understand the targeted device and board.
Memory: View quick memory map of project.
Build Configurations: Select build configuration from available list (i.e. Debug or Release).
Associate the Required MCUXpresso SDK
Sometimes, Projects imported/converted from the Application Code Hub do not automatically have a valid SDK associated to them. This can be caused by the required SDK not being installed and imported into the workspace.The prework for this lab installed the expected FRDM-MCXN947 SDK. The import wizard should associate the information from the project with the available SDK.
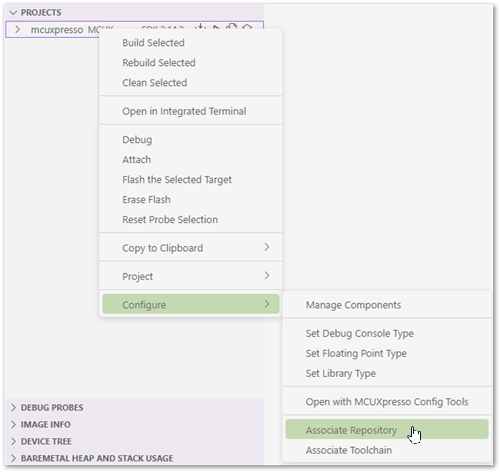
If Project information is blank (i.e. Repository Information), you must manually associate an SDK with a project.The Following steps will assign the FRDM-MCXN947 SDK to the project:
Right Click on the Project to fix.
In the Drop-down menu, Select Configure -> Associate Repository
Select SDK-FRDM-MCXN947 from a list of availble SDK repos listed at the top of VS Code window below search bar.
Now the correct information should be displayed for the project.
Note: If a valid SDK is not assigned, a project will fail to build with an Error message noting that a CMAKE build configuration is not located.
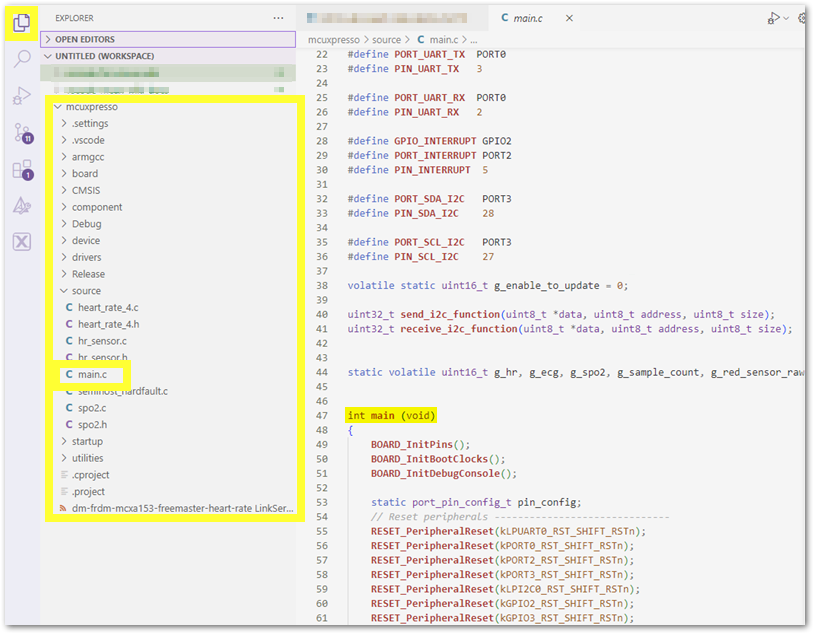
Working with Source Files Go to Explorer -> Click on MCX N Face Recognition and you will find the Source files like main.cpp etc in the Dropdown
4. Build the application
The MCX Lab Facial Recognition project needs to build the application image. After the code builds without any errors, the application can be run on the FRDM board.
If not done already, connect the USB-C cable to J17 to power the FRDM board. This provides power to the board and the onboard debugger provides a USB-UART bridge to interface with the Serial monitor.
Build the project by clicking the Build Selected icon.

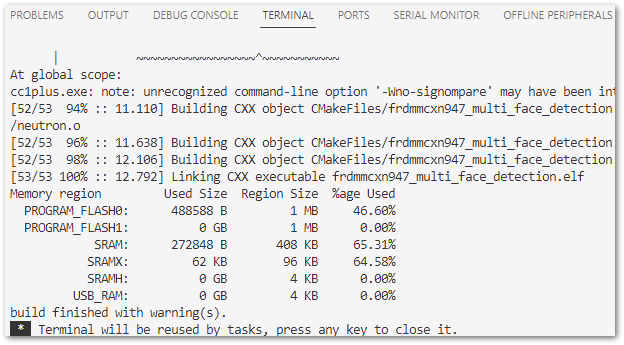
After the build, the debug console window displays the memory usage (or compiler errors if any).
5. Debug the application
This section uses the GDB debugger to connect to the MCU, and program the flash.
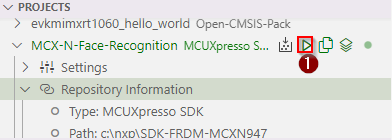
Click the play icon to Debug the application:
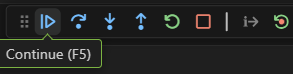
The execution will pause. To continue execution click Continue on the debug options.
After building the application, Right click on the Project Name i.e., ‘MCX-N-Facial Recognition’ and select ‘Flash the Selected Target’.
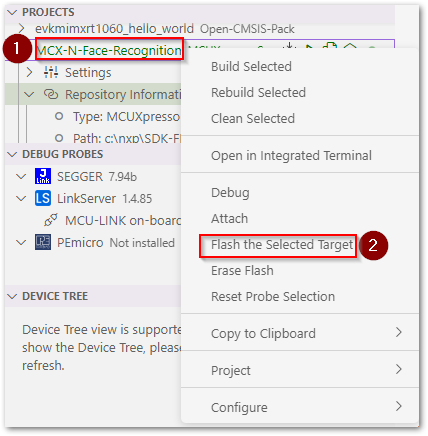
After the .elf file is flashed to the target device, the camera starts detecting the face and displays the image on the LCD display
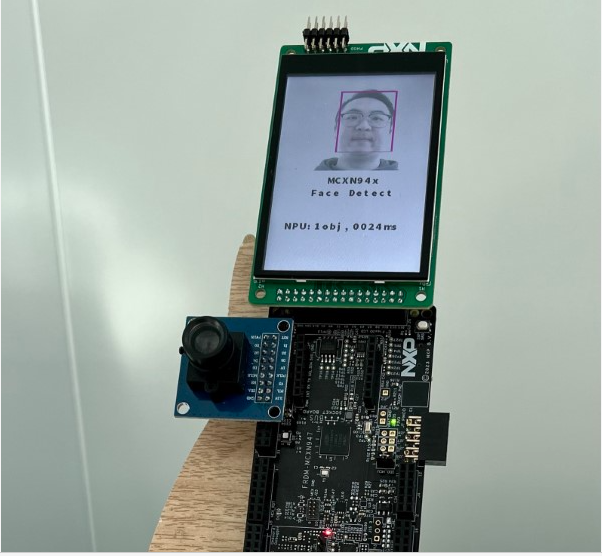
Record the NPU Inference Time/Latency for comparison
6. Modify NPU
In the Explorer tab, go to the imported project i.e., MCX-N-Face-Recognition and click on the file model_data.s
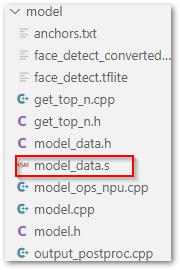
In line 43, change face_detect_converted.tflite to face_detect.tflite and rebuild the model i.e., repeat Steps 4 and 6 to build and flash the application.

You will now see that the performance of the model without using the NPU is now 30 times slower and the latency is higher.
The Facial Recognition Lab is now completed.
Return to Getting Started with MCX using Application Code Hub