Training Zephyr Getting Started RT1060
Recommended Zephyr Revision
Importing the Zephyr repository during the Installation steps requires a Zephyr revision. For the MIMXRT1060-EVK boards, we generally recommend starting with the latest Zephyr release. The Repository Importer tool will default to the latest Zephyr release. For more details, see Zephyr Revision.
Hardware Requirements
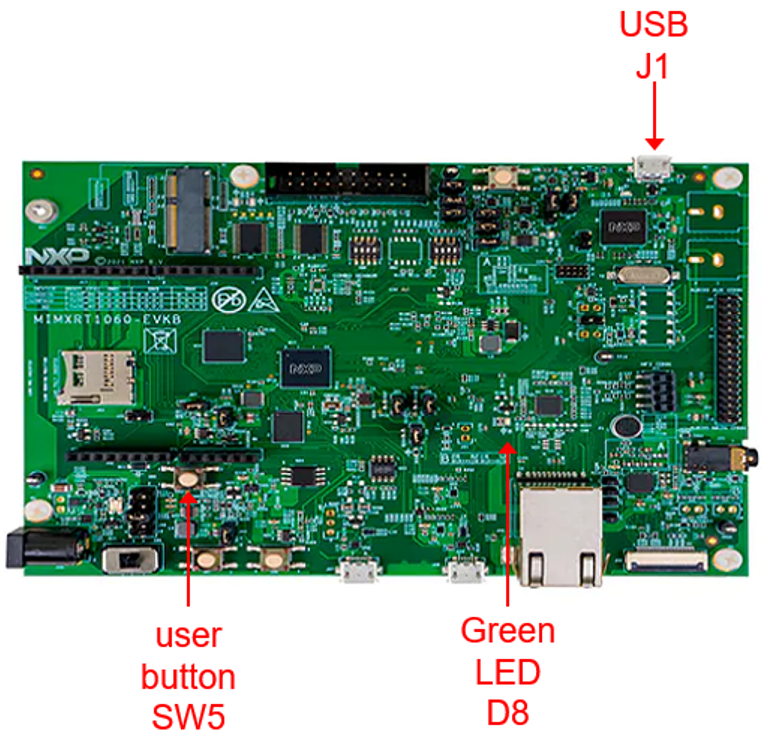
These labs are written for the evaluation board listed below. However, these labs use sample applications in the Zephyr repository, and will easily run on other NXP boards supported in the Zephyr tree:
micro-USB cable
This EVK integrates an on-board debugger, and the labs are written to use this debugger with the default OpenSDA CMSIS-DAP debug probe.
Zephyr Lab Guides with VS Code
This set of lab guides provide detailed steps to get started with Zephyr and the MCUXpresso extension for VS Code:
Lab 2: Zephyr Lab RT1060 Kconfig
Lab 3: Zephyr Lab RT1060 Debug
Lab 4: Zephyr Lab RT1060 Devicetree
Lab Appendix: Zephyr Lab Revert Workspace
Lab Notes
The lab steps are written for Windows 11. But Zephyr and NXP’s tools, including the MCUXpresso extension for VS Code, are also supported on Ubuntu and macOS. All the labs will work on each supported OS with minimal changes needed.
File Paths - The file paths used in these steps follow the Windows guidelines in the Zephyr Getting Started documentation, to place the zephyrproject folder in the user path
c:\Users\<USER_NAME>\zephyrproject. These steps reference the user name NXP, so the path provided in the steps isc:\Users\NXP\zephyrproject. Be sure to change this path to match your installation.