Create Project
PROJECTS view provides a suite of possibilities for creating or importing an application. Also, this view is responsible to manage the created projects in order to add/remove components, build, debug, remove existing ones.
Import a project from source repository
Once a source repository is available in MCUXpresso for VS Code, you can create your own application by importing an example from the repository.
You have several options to open the wizard to create a project:
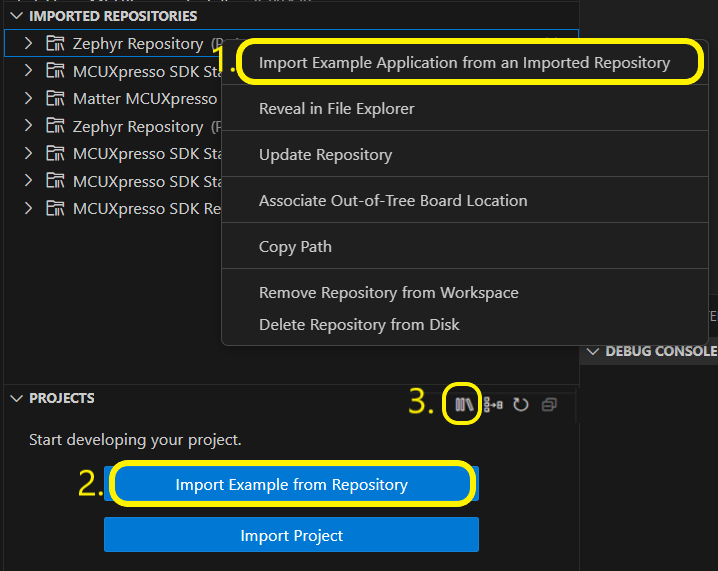
Select the desired available repository within IMPORTED REPOSITORIES view, right-click on it and select “Import Example Application from an Installed Repository” or
From PROJECTS view (in case it has no projects yet) press “Import Example from Repository” button or
From PROJECTS view toolbar select “Import Example Application from an Imported Repository” option.
Selecting one of the above options will open a wizard with few steps to follow until the project can be generated.
You then have to fulfill some required fields:
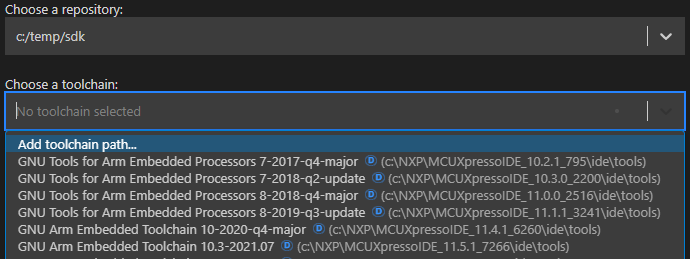
Choose a repository - select from the imported source repository (can be MCUXpresso, Zephyr or a custom one)
Choose a board - select one listed here (the ones available within the selected repository)
Choose a template - this is the list of available project templates for selected repository/board from above
App type - application type selection
Name - project name. This will be further referred in the workspace. If the project’s name already exists, an error will indicate this
Location - path for the project. The path will be created if not exists. This field is available, unless the application is kept in repository.
Choose a toolchain - select one of the already installed toolchains
Open readme file after project is imported - this option will open existing example readme in case it exists (when the project will be created, after pressing “Import” button); this option is unchecked by default
Application Types
The following application types are available depending on the selected repository type:
Repository application- application is located directly in the repository folder (example’s source code will not be copied)Freestanding application- example’s source code will be copied in the destination folderWorkspace application- project is in the repository workspace (see Zephyr Application Development for details).Standalone application- project is self-contained and independent of the repository.
| Repository Type | Application Type | |||
| Repository | Freestanding | Workspace | Standalone | |
| MCUXpresso SDK 2.x | ✓ | |||
| MCUXpresso SDK 24.12 to 25.09 | ✓ | ✓ | ||
| MCUXpresso SDK 25.12 and newer | ✓ | ✓ | ✓ | |
| Zephyr | ✓ | ✓ | ✓ | |
| Matter | ✓ | ✓ | ||
Note: For now, support for “Standalone application” is marked as “Experimental” and needs to be enabled first. To enable it go to Settings->Extensions->MCUXpresso for VS Code and check the “Enable Standalone Projects” checkbox.
Import an existing project
Import an existing MCUXpresso project by selecting one of the following options:
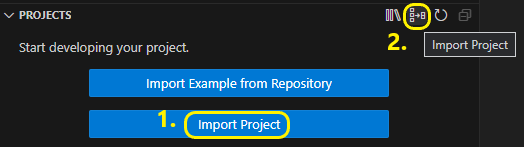
From PROJECTS view (in case it has no projects yet) press “Import MCUXpresso for VS Code Project” button or
From PROJECTS view toolbar select “Import MCUXpresso for VS Code Project” option.
From the wizard, select the existing project (choose from archived, folder project options or executable; choosing an executable file will result in creating a new project that will allow debugging and accessing the available binary tools options for that executable).
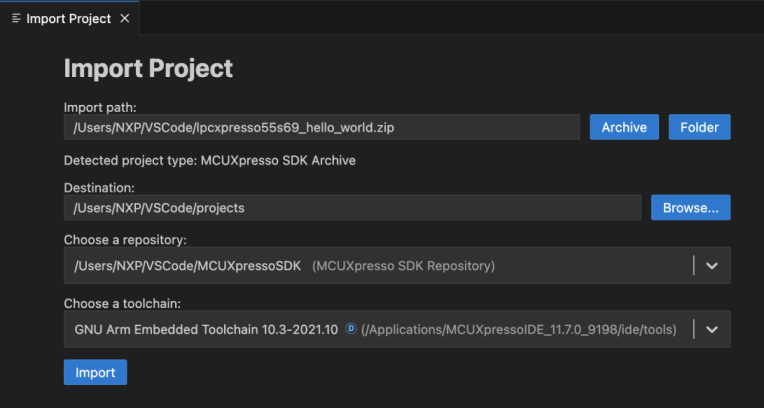
You have to fill the required fields:
Import path - select the project archive path
Destination - select the path where the project will be imported
Choose a repository - select one of the already imported repositories which are compatible with the imported project type. Pick a suitable one or use Add repository path option from the combobox
Choose a toolchain - select one of the already installed toolchains. Pick a suitable one or use Add toolchain path option from the combobox
Import a project based on an existing executable file
To import a project from an existing executable press the “Executable” button from the import project wizard, choose the executable file and fill in the required information ( destination, toolchain).
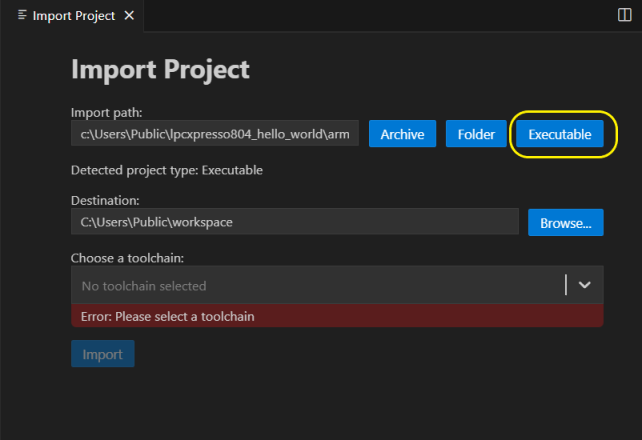
Since the newly created project won’t contain any source files this project won’t have the option to build/rebuild the project or to create any build configuration. However, the project can be debugged once a device target is associated with the project. This can be done by either associating a repository with the project or by simply starting a debug session and providing the necessary information.
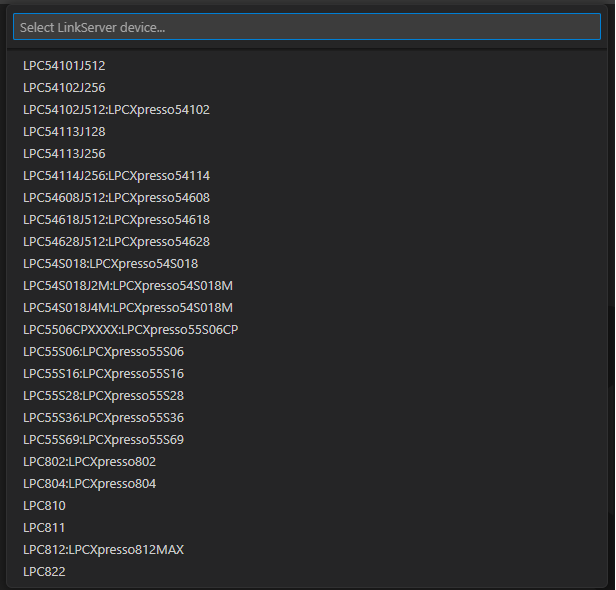
For example, on LinkServer the extension will first present a list of all the supported devices.
A project resulted from importing an executable file has the existing binary tools support: Image Info options and the tools from “Binary utilities” menu are available.
Import an existing project from folder
To import an existing project from folder choose “Folder” button from the import project wizard.
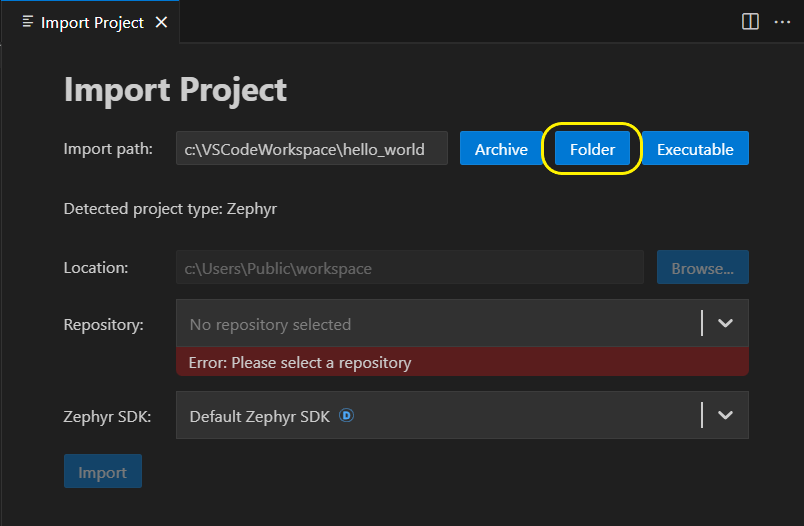
If the selected folder is an actual project, the path will be automatically filled in “Import Path” field.
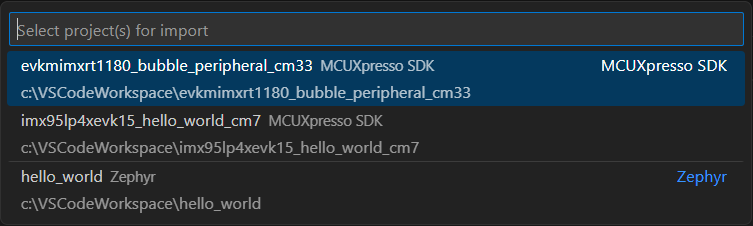
Otherwise, a quick pick will appear listing the available projects in the given folder plus its nested directories, recursively. User can choose only one project from the list, and the “Import Path” field will be filled accordingly.
Note: Importing projects from installed repositories is not available using “Import Project from Folder”. To import an SDK project, please use the “Import Example from Repository” option.
Export a project
An existing project can be exported to an archive. This can be achieved by selecting a project, open context menu and select Project -> Export MCUXpresso Project Archive.
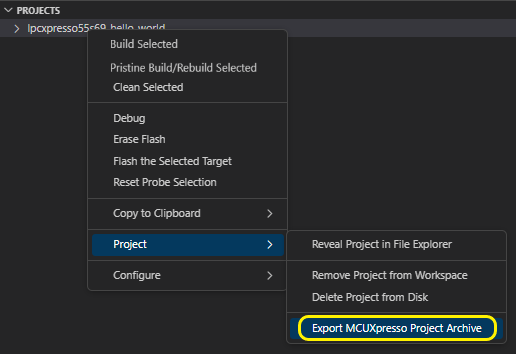
You’ll be asked then to provide a path where the archive will be generated. The default is the path where the project is located.
Move a project from one machine to another
A project can be moved from one machine to another by using the export and import project features.
First you need to export the desired project using Export MCUXpresso Project Archive option. After that, you need to copy the generated project archive to the other machine.
Once the project archive is available on the second machine, you can use the Import Project Wizard feature to import the project.
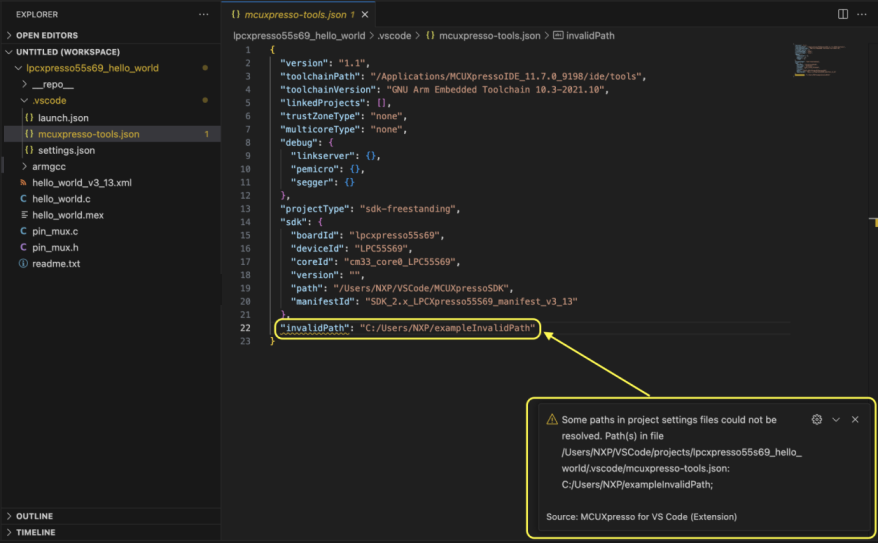
After importing the project, the repository and toolchain paths are updated according to the values selected in the Import Project Wizard.
The extension reports all paths in project settings files (files in .vscode project directory) that could not be automatically resolved. In this case, the user needs to manually update them.
Build configuration
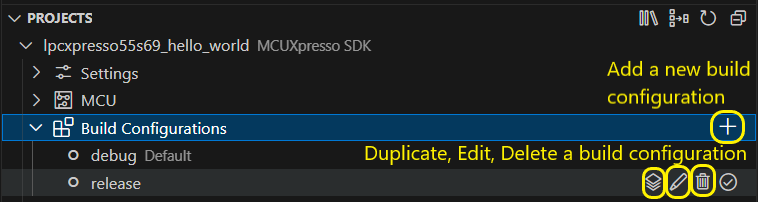
The PROJECTS view displays all available build configurations for each project. One is selected by default, any other can be selected using “Set as Default” option.
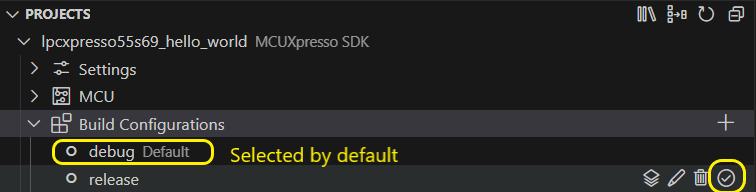
Additionally, you can add, duplicate, edit or delete a build configuration.
Build project
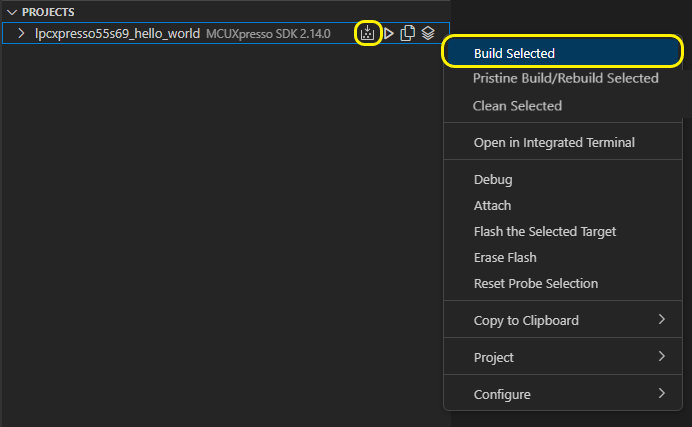
The next step is to build the executable file. Use Build Selected option from toolbar or right click on the desired project and select Build selected. This will start building the selected build configuration. The output generated files can be found in the VS Code Explorer view.
Debug configurations
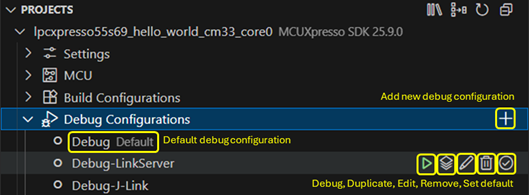
The PROJECTS view allows you to manage debug configurations for your projects. You can add, remove, duplicate, and edit debug launch configurations. Moreover, using the inline buttons associated to each debug configuration, you can easily start a debug session using the selected configuration.
There is also a Default debug configuration that you can manually set. The default debug configuration will be used when you start a debug session by clicking the Debug button associated to the project.
When there is no Default debug configuration and the Debug button associated to a project is clicked, the extension will prompt you to select a debug configuration from a list of available configurations, if this is the case. The debug configuration selected using the quick-pick will be set as the default debug configuration for the project.

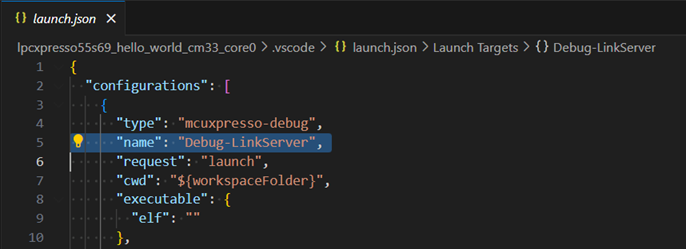
Debug configuration editing is achieved by using the built-in VS Code editor. The MCUXpresso for VS Code extension will open launch.json file in a dedicated editor, and highlight the name of the specific debug configuration.
Toolchain Management
One important aspect is the toolchain management. This extension is able to identify existing MCUXpresso SDK or Zephyr installed toolchains, depending on the selected repository type, and can also detect the user-added options. Users can choose their preferred toolchain either during project creation or when configuring an existing project.
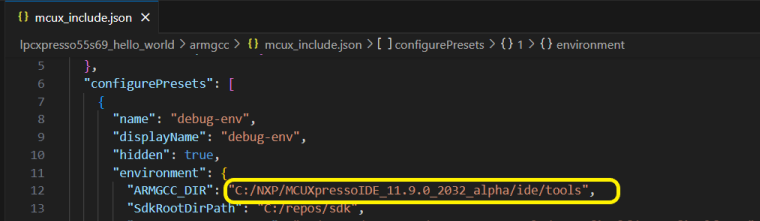
Once the project is created, the toolchain selection is preserved in project settings, in JSON format in the file mcux_include.json. This file contains all variables for the CMakePresets.json file.
Changing the associated toolchain or Zephyr SDK for an existing project
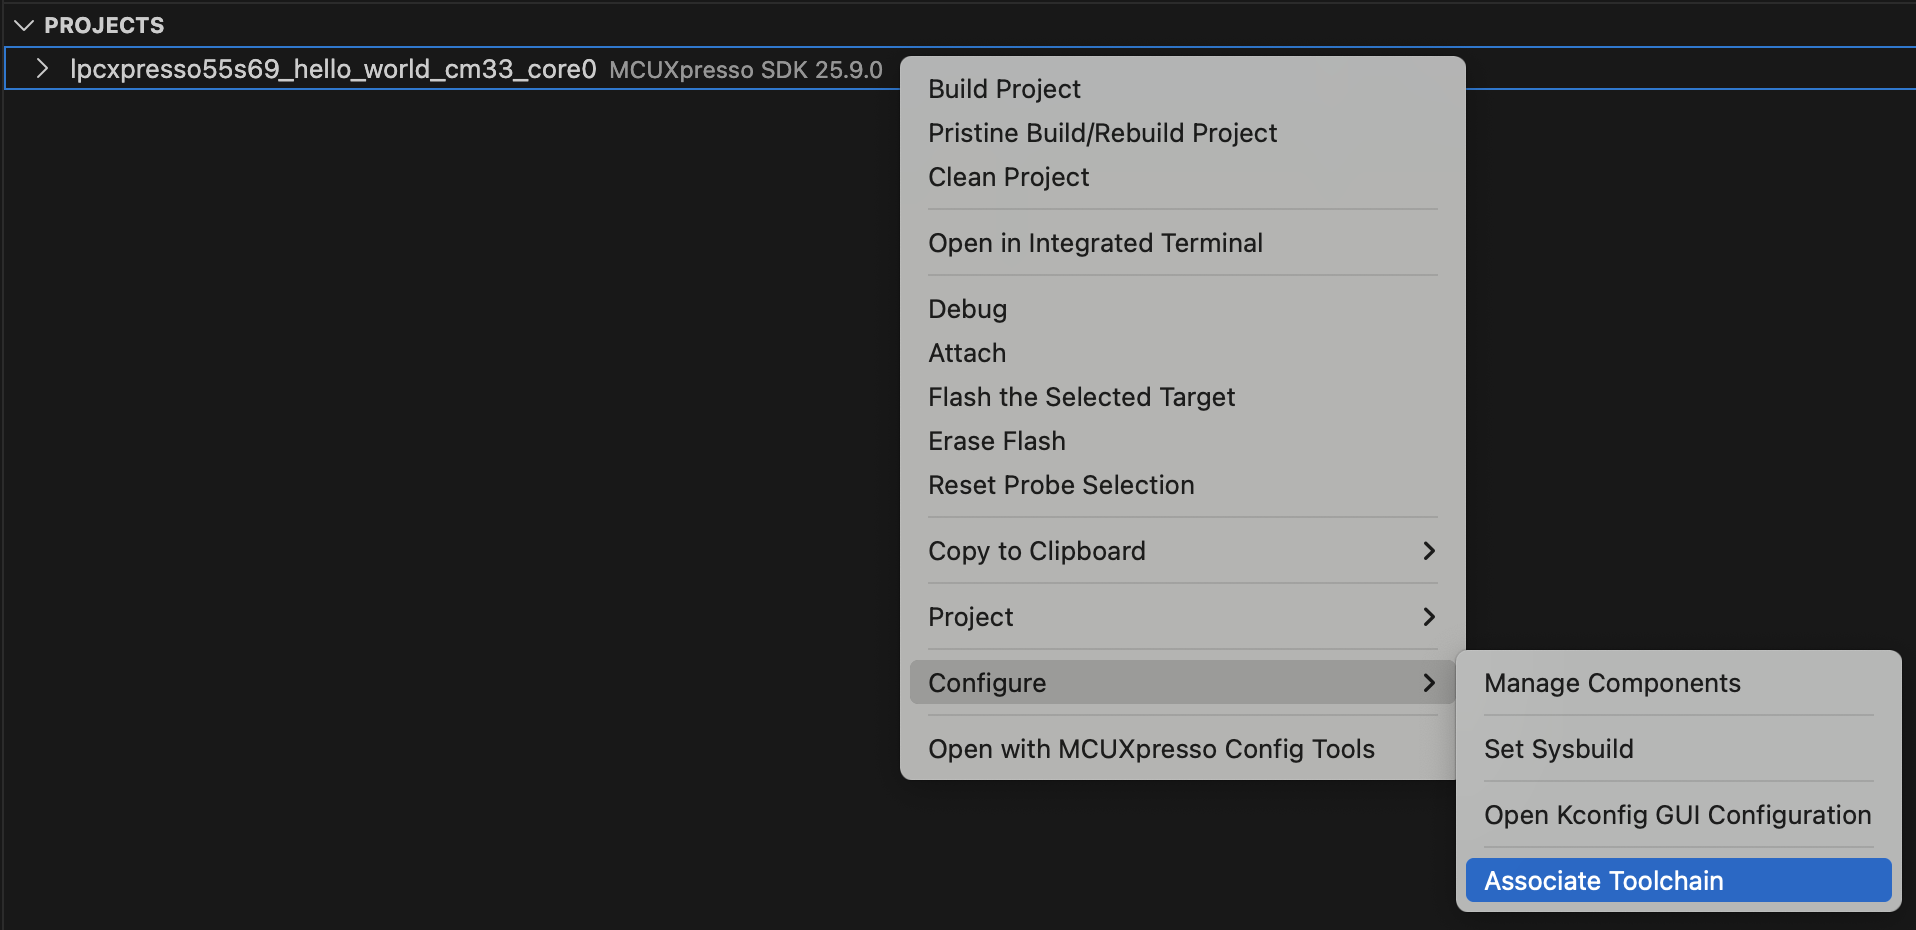
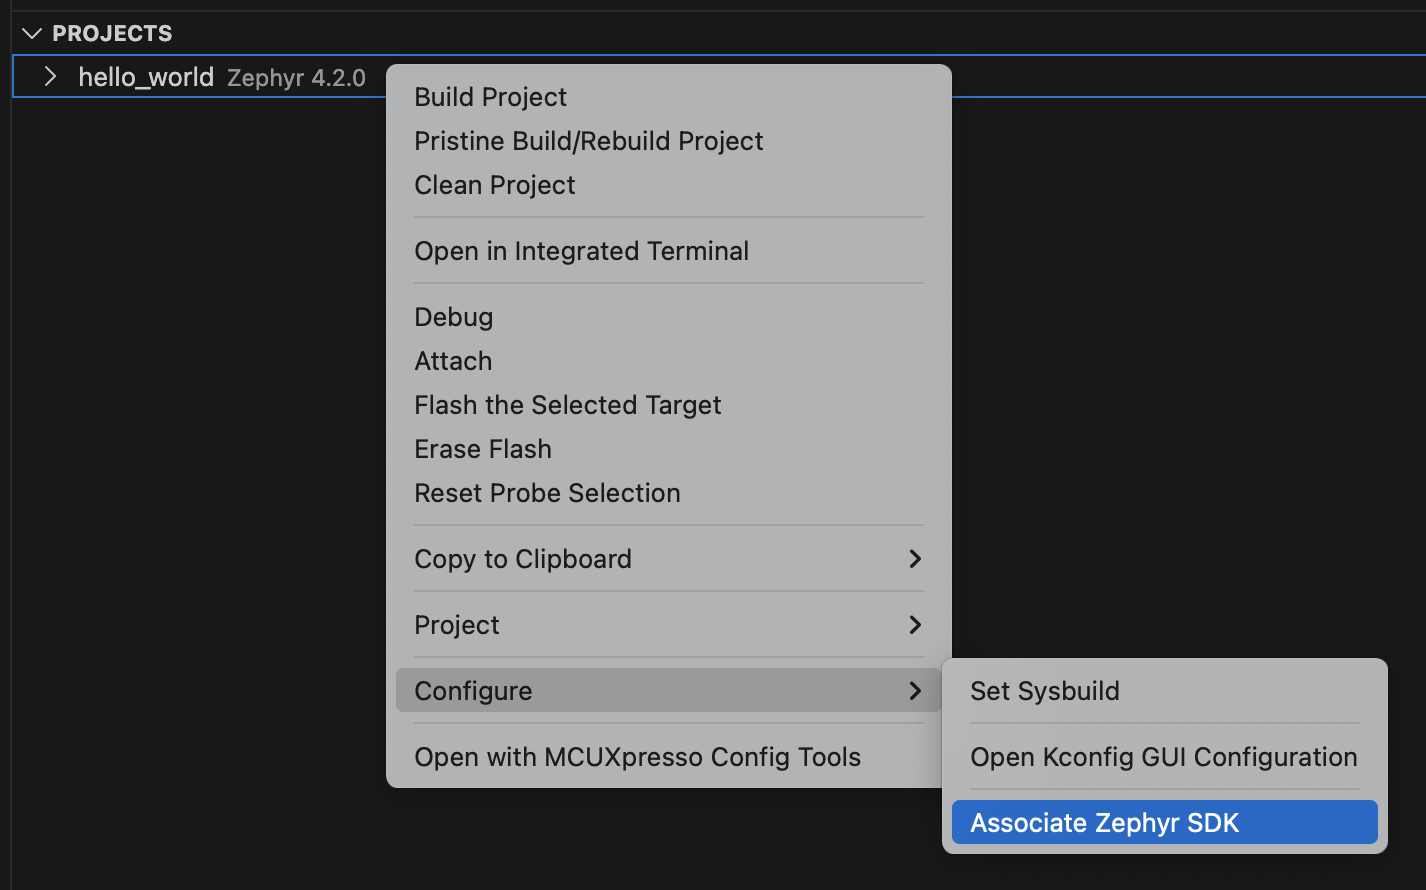
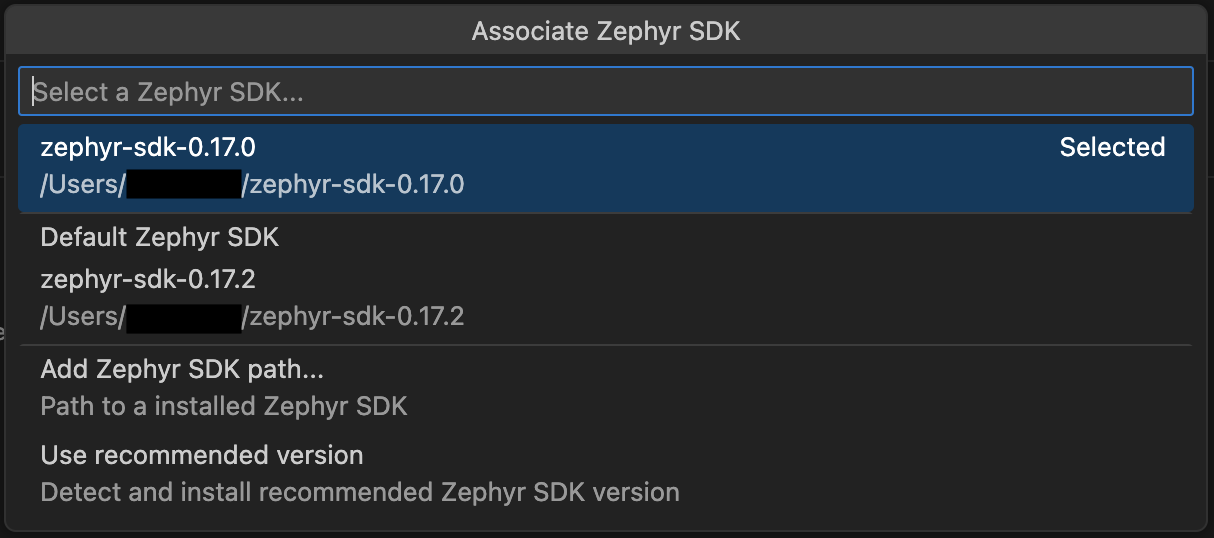
The associated toolchain or Zephyr SDK can be modified for an existing project. To change it, right-click on the project, navigate to “Configure”, and select “Associate Toolchain” or “Associate Zephyr SDK”.
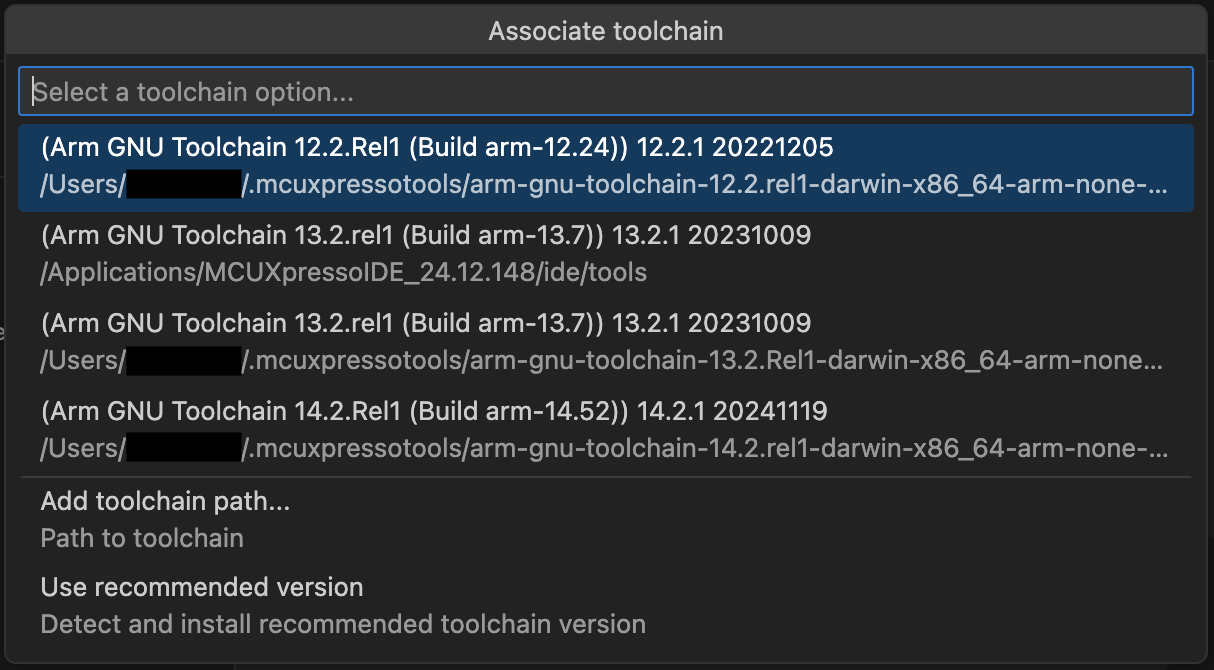
A quick pick menu will appear with the following options:
Available toolchains or Zephyr SDKs - Lists all toolchains or Zephyr SDKs currently installed on your system.
Add toolchain path… - Allows you to manually specify a custom toolchain location.
Use recommended version - Automatically detects and installs the recommended toolchain version for your project. This option ensures compatibility with the associated repository requirements. When selected, the extension will:
Detect the recommended toolchain version from the repository information.
Verify if the version is already installed on your system.
Initiate an automatic installation process if the version is not found.
Note: Automatic installation requires installer integration support to be enabled. See Installer Integration NXP GitHub Documentation for more details.
Once the recommended version is installed and detected, it will be automatically associated with your project.
Default Zephyr SDK - Available only for Zephyr projects, this option allows you to use the default Zephyr SDK configuration, the build system will decide which Zephyr SDK to use from the installed ones.
Toolchain and Zephyr SDK version validation when building a project
When building a project, if the associated toolchain or Zephyr SDK version does not match the recommended version for that project, the extension will display a warning notification. This ensures that your project builds with the correct toolchain or Zephyr SDK configuration and helps avoid potential compatibility issues.
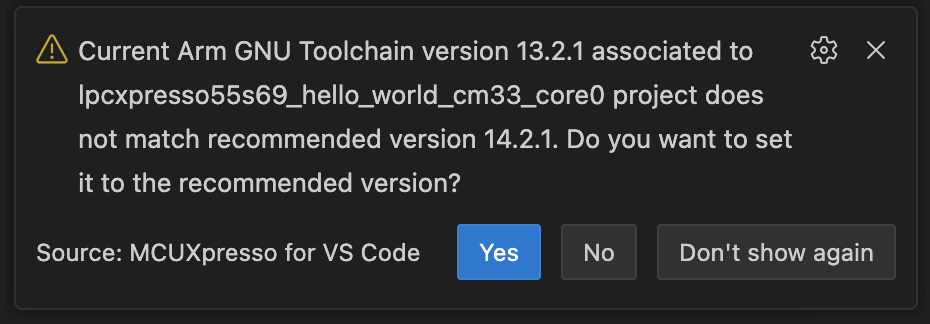
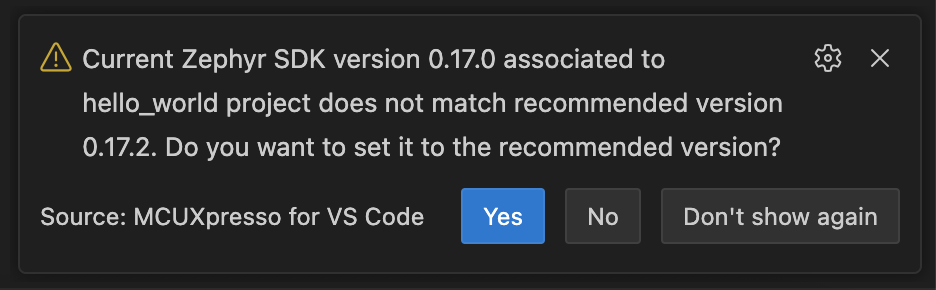
The notification will show:
The current toolchain or Zephyr SDK version associated with your project.
The recommended toolchain or Zephyr SDK version for your project.
Options to update or keep the current version.
Selecting “Yes” triggers an automatic update to the recommended version. The extension will detect and install the recommended version if needed, following the same workflow as the “Use recommended version” option detailed in the “Changing the associated toolchain or Zephyr SDK for an existing project” section above.


Selecting “No” maintains the currently associated version for your project. Additionally, you can select “Don’t show again” to disable future version mismatch warnings for this specific project.
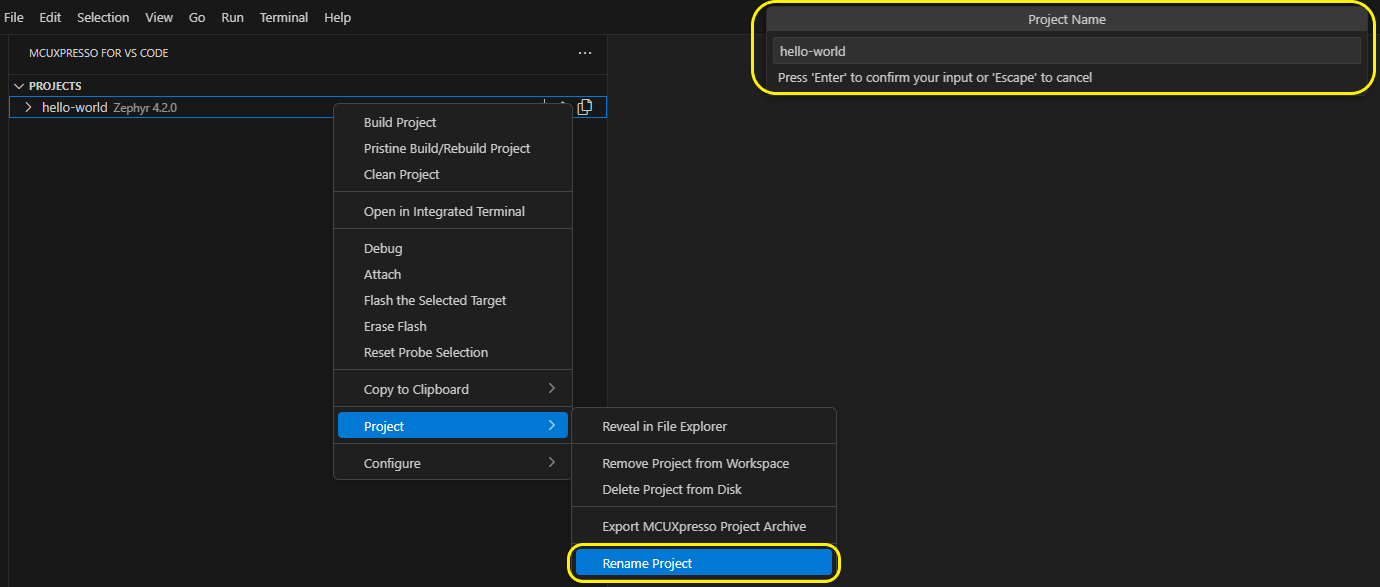
Rename project
You can rename a project in MCUXpresso for VS Code by right-clicking the project and selecting ‘Project -> Rename Project’ from the context menu and updating the project name in the quick input dialog.
Variables Reference
Variable substitution is supported in mcuxpresso-tools.json for defining paths (like: toolchainPath, sdk.path).
You can use environment variables, like:
"toolchainPath": "%HOMEPATH%/.mcuxpressotools/arm-gnu-toolchain-12.2.rel1-mingw-w64-i686-arm-none-eabi".
The following predefined variables are supported:
${userHome}- the path of the user’s home folder${workspaceFolder}- the path of the current project${workspaceFolderBasename}- the name of the current project${pathSeparator}- the path separator used by the operating system